Kia Picanto (JA): Sunroof / Sunroof Assembly
Kia Picanto (JA) 2017-2026 Service & Repair Manual / Body (Interior and Exterior) / Sunroof / Sunroof Assembly
Components and components location
| Components |
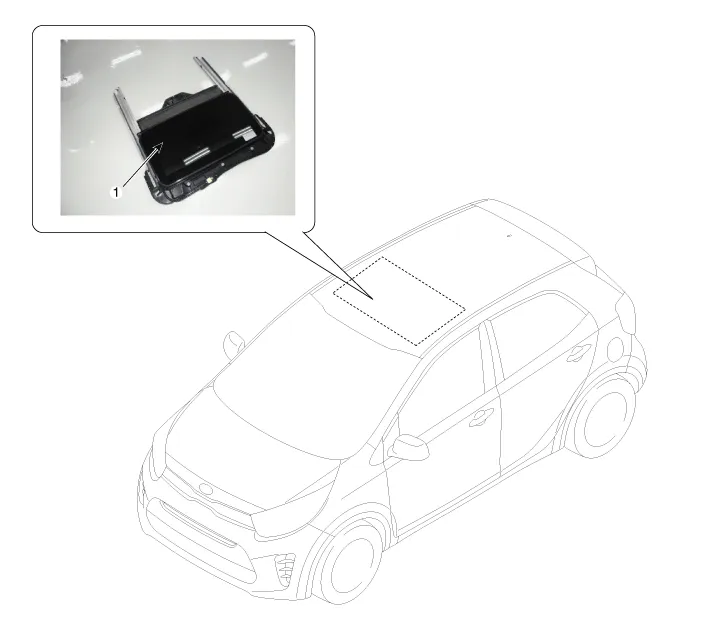
| 1. Sunroof assembly |
Repair procedures
| Replacement |
|

| 1. | Remove the roof trim.
(Refer to Roof Trim - "Roof Trim Assembly")
|
| 2. | Remove the sunroof glass.
(Refer to Sunroof - "Sunroof Glass")
|
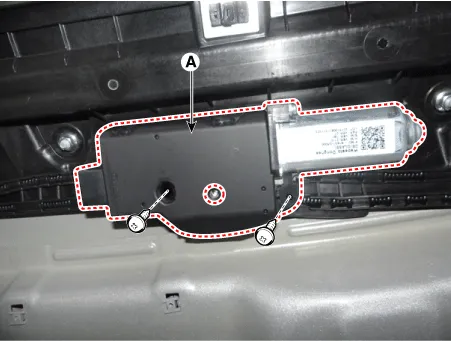
| 3. | Loosen the mounting screws and remove the sunroof motor (A).
|
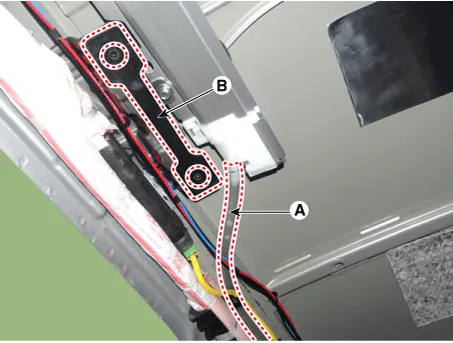
| 4. | Remove the drain hose (A) and assist handle guide plate (B).
|
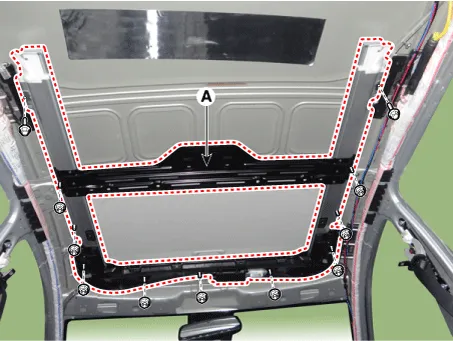
| 5. | Remove the sunroof assembly (A) after loosening the nuts and bolts.
|
| 6. | Install in the reverse order of removal.
|
Repair procedures Replacement 1. Open the glass fully. 2. Remove the mounting pins (B), and then remove the deflector (A). 3. Install in the reverse order of removal.
Repair procedures Replacement 1.Remove the sunroof assembly. (Refer to Sunroof - "Sunroof Assembly") 2.Remove the drip rail assembly (A) after loosening the mounting screws.
Other information:
Kia Picanto (JA) 2017-2026 Service & Repair Manual: Headlamp Leveling System
C
Kia Picanto (JA) 2017-2026 Service & Repair Manual: Map Lamp
Repair procedures Removal • Put on gloves to prevent hand injuries. • When removing with a flat-tip screwdriver or remover, wrap protective tape around the tools to prevent damage to components.
Categories
- Manuals Home
- Kia Picanto Owners Manual
- Kia Picanto Service Manual
- Front Disc Brake
- To set cruise control speed
- Thermostat
- New on site
- Most important about car

Copyright © 2026 www.kpicanto.com - 0.0227