Kia Picanto (JA): Body (Interior and Exterior) / Sunroof
Components and components location
| Components |
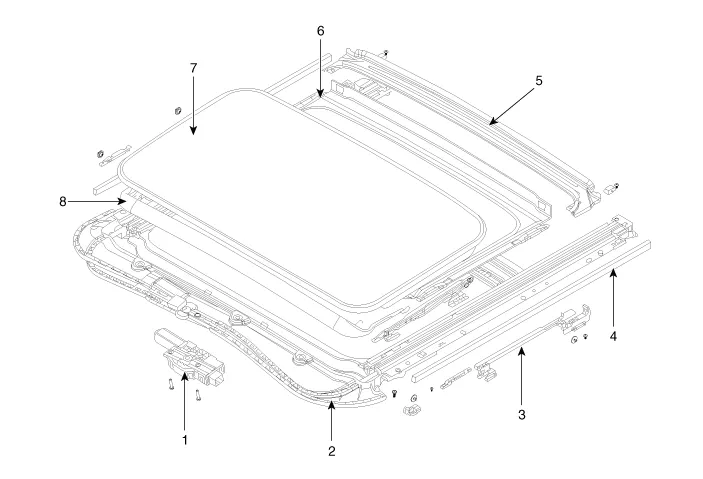
| 1. Sunroof motor assembly 2. Sunroof sub frame assembly 3. Sunroof drip link 4. Sunroof seal tape | 5. Sunroof drip rail 6. Sunroof sunshade assembly 7. Sunroof glass panel assembly 8. Sunroof deflector assembly |
Repair procedures
| Adjustment |
| 1. | Inspect the step height between the roof panel (A) and the glass weatherstrip (B) and then adjust it if necessary.
|
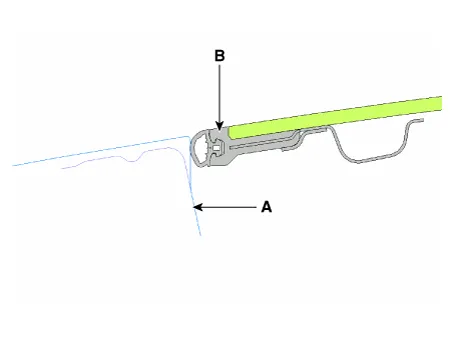
| 2. | Adjust the height of the glass by slightly loosening the screws (A).
|

| 1. | After initial vehicle assembly. |
| 2. | If the initial value is erased or damaged because of short power electric discharge during operation. |
| 3. | After using the manual handle. |
| 1. | Use
the sunroof emergency handle to close or open the sunroof manually if
the sunroof cannot be closed electronically due to motor or controller
electrical malfunction.
|

| 2. | If needed, initialize the sunroof according to the initialization method. Whenever
the vehicle battery is disconnected or discharged, or using the
emergency handle to operate the sunroof, the sunroof system needs to be
reset as follows:
|
Components and components location Component Location 1. Inside rear view mirror Repair procedures Replacement Put on gloves to protect your hands.
Components and components location Components 1. Sunroof glass Repair procedures Replacement Put on gloves to protect your hands.
Other information:
Kia Picanto (JA) 2017-2026 Service & Repair Manual: Junction Box (Passenger Compartment)
Components and components location Component Location I/P Junction Box Circuit (I/P Junction Box) Description and operation Description Communication Network Diagram Abbreviation Explanation ABS Anti-lock Brake System ACU Airbag Control Un
Kia Picanto (JA) 2017-2026 Service & Repair Manual: Lighting System
Specifications Specification Item Type Bulb Watt (W) Front Headlamp Halogen (Position lamp) Low/High H4 LL 55/60 Turn signal lamp PY21WLL 21 Position lamp W5WLL 5 Halogen (Position lamp + DRL) Low/High HB3 (9005HL+) 60 Turn signal lamp LED LED Po
Categories
- Manuals Home
- Kia Picanto Owners Manual
- Kia Picanto Service Manual
- Normal Condition
- Brake System
- Cylinder Head
- New on site
- Most important about car
