Kia Picanto (JA): Body Electrical System / Lighting System
Specifications
| Specification |
|
Item
|
Type
|
Bulb Watt (W)
| |||
| Front | Headlamp | Halogen (Position lamp) | Low/High | H4 LL | 55/60 |
| Turn signal lamp | PY21WLL | 21 | |||
| Position lamp | W5WLL | 5 | |||
| Halogen (Position lamp + DRL) | Low/High | HB3 (9005HL+) | 60 | ||
| Turn signal lamp | LED | LED | |||
| Position lamp | LED | LED | |||
| Daytime Running Light (DRL) | LED | LED | |||
| Front fog lamp | HB4 | 51 | |||
| Turn signal lamp (Side) | WY5W | 5 | |||
| Door mirror turn signal lamp | LED | LED | |||
| Rear | Rear combination lamp | Bulb Type | Tail lamp | W5WLL | 5 |
| Tail / Stop lamp | P21/5WLL | 21 | |||
| Turn signal lamp | PY21WLL | 21 | |||
| Back up lamp | W16W | 16 | |||
| LED Type | Tail lamp | LED | LED | ||
| Tail / Stop lamp | LED | LED | |||
| Turn signal lamp | PY21WLL | 21 | |||
| Back up lamp | W16W | 16 | |||
| High mounted stop lamp | Bulb Type | W5WLL | 5 | ||
| License plate lamp | W5WLL | 5 | |||
| Interior | Map lamp | W10W | 10 | ||
| Room lamp | FESTOON | 8 | |||
| Luggage lamp | FESTOON | 8 | |||
| Glove box lamp | W5W | 10 | |||
Components and components location
| Component Location |

| 1 . Headlamp (Low/High Bi-function) 2. Position lamp 3. Turn signal lamp | 4 . Daytime Running Light (DRL) 5. Turn signal lamp (Door mirror / Side) 6. Map lamp |
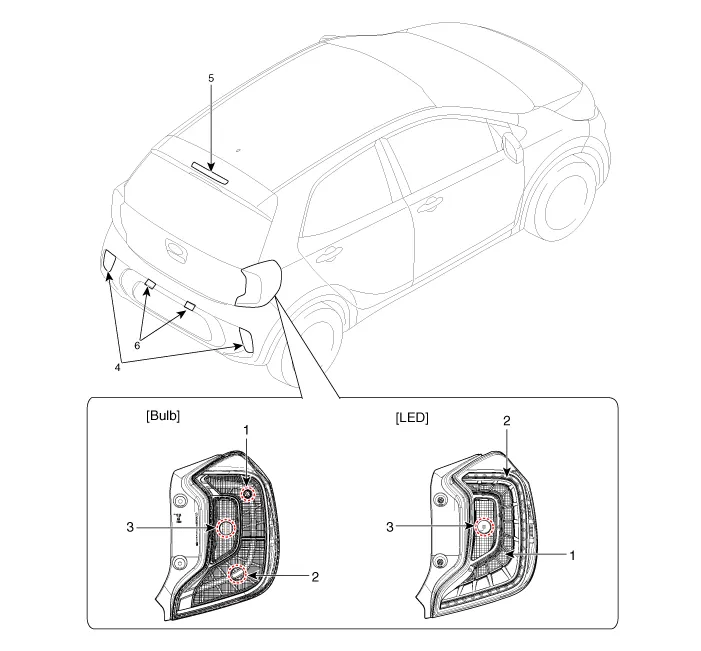
| 1 . Tail lamp 2. Stop / Tail lamp 3 . Turn signal lamp | 4 . Back up lamp 5 . High mounted stop lamp 6 . License lamp |
- Headlamps
- Turn Signal Lamp
- Map Lamp
- Hazard Lamp Switch
- Front Fog Lamps
- License Lamps
- High Mounted Stop Lamp
- Rear Combination Lamp
Specifications Specification Item Specification Power source 3 V Operating temperature -22 - 167°F (-30 - 75°C) RF Modulation FSK LF Modulation ASK RF frequency 433.
Description and operation Description BI-FUNCTION 1. Definition – A headlamp with integrated functions of high and low beam – The light is controlled by rotating the shield inserted to the lens.
Other information:
Kia Picanto (JA) 2017-2026 Service & Repair Manual: Hazard Lamp Switch
Repair procedures Inspection 1.Check for continuity between terminals. If the continuity is not as specified, replace the hazard lamp switch. No. Description No.
Kia Picanto (JA) 2017-2026 Service & Repair Manual: Power Door Mirror Switch
Components and components location Component Schematic diagrams Circuit Diagram [Folding Mirror Type] [Non-Folding Mirror Type] Repair procedures Inspection 1.Check for continuity between the terminals in each switch position according to the table.
Categories
- Manuals Home
- Kia Picanto Owners Manual
- Kia Picanto Service Manual
- Coolant
- Fuel Delivery System
- Automatic Transaxle Fluid
- New on site
- Most important about car
