Kia Picanto (JA): Interior Trim / Luggage Side Trim
Components and components location
| Component Location |

| 1. Luggage side trim |
Repair procedures
| Replacement |
Put on gloves to protect your hands. |

|

| 1. | Remove the rear seat assembly.
(Refer to Rear Seat - "Rear Seat Assembly")
|
| 2. | Remove the rear door scuff trim by using a remover.
|

| 3. | Remove the luggage board(A).
|

| 4. | Disconnect the tailgate weatherstrip. |
| 5. | Remove the rear transverse trim (A).
|
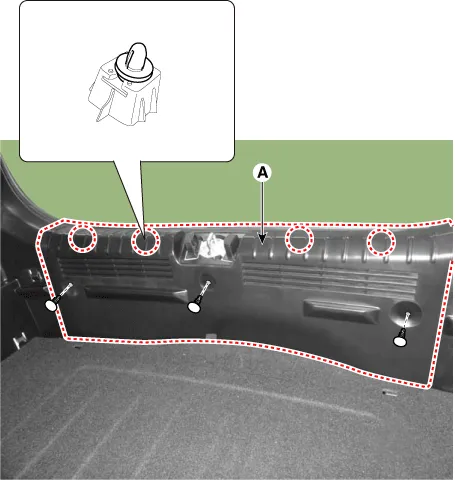
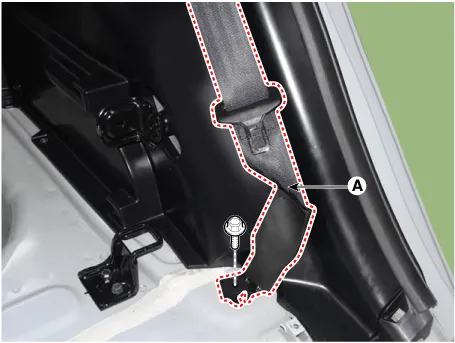
| 6. | Separate the rear seat belt lower anchor (A) after loosening the mounting bolt.
|
| 7. | Remove the folding bracket (A) after loosening the mounting bolts.
|

| 8. | Remove the luggage side trim (A) after loosening the mounting screws.
|

| 9. | Disconnect the luggage lamp connector (A).
|

| 10. | Install in the reverse order of removal.
|
Components and components location Component Location 1. Rear transverse trim Repair procedures Replacement Put on gloves to protect your hands.
Components and components location Component Location 1. Rear pillar trim Repair procedures Replacement Put on gloves to protect your hands.
Other information:
Kia Picanto (JA) 2017-2026 Service & Repair Manual: Emergency Call System
Components and components location Components 1. Head unit (AVN, Audio) 2. Emergency call system button 3. Emergency call system MIC 4. Roof antenna 5. Emergency call unit 6. Supplemental Restraint System Control Module (SRSCM) 7. Emergency call crash pad antenna 8.
Kia Picanto (JA) 2017-2026 Service & Repair Manual: Ignition Switch Assembly
Repair procedures Inspection 1.Disconnect the key warning switch connector (A) and ignition switch connector (B) from the steering column. 2.Check for continuity between the terminals. 3.If continuity is not specified, replace the switch.
Categories
- Manuals Home
- Kia Picanto Owners Manual
- Kia Picanto Service Manual
- Automatic Transaxle Fluid
- Engine Oil and Filter
- Brake System
- New on site
- Most important about car
