Kia Picanto (JA): Interior Trim / Rear Pillar Trim
Kia Picanto (JA) 2017-2026 Service & Repair Manual / Body (Interior and Exterior) / Interior Trim / Rear Pillar Trim
Components and components location
| Component Location |
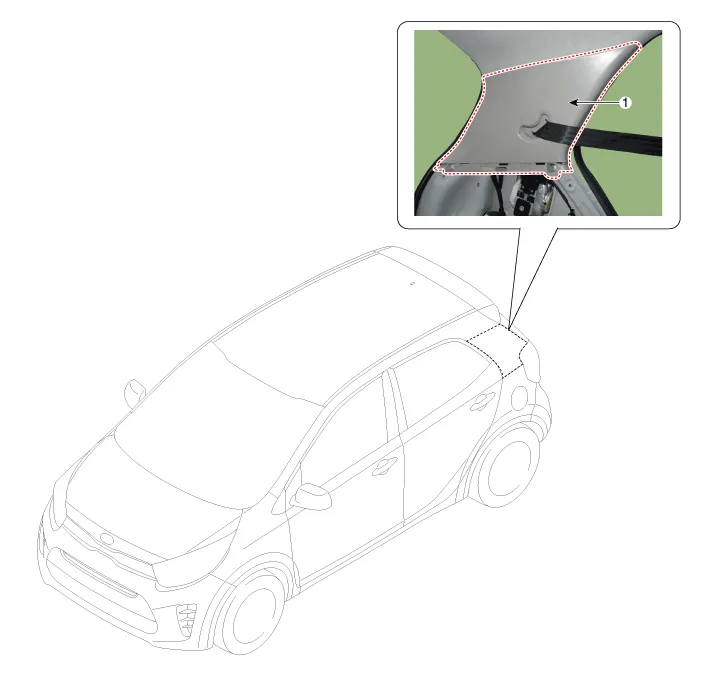
| 1. Rear pillar trim |
Repair procedures
| Replacement |
Put on gloves to protect your hands. |

|

| 1. | Remove the rear seat assembly.
(Refer to Rear Seat - "Rear Seat Assembly")
|
| 2. | Remove the rear door scuff trim by using a remover.
|

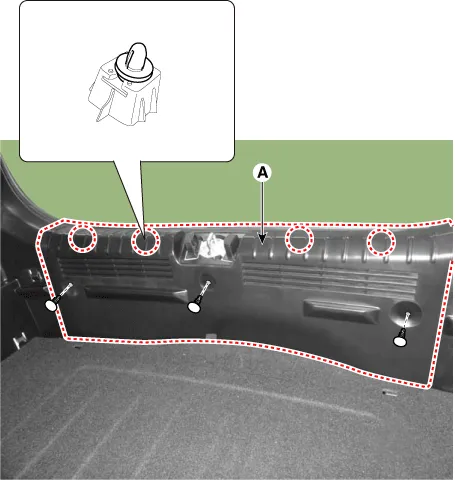
| 3. | Remove the luggage board(A).
|

| 4. | Disconnect the tailgate weatherstrip. |
| 5. | Remove the rear transverse trim (A).
|
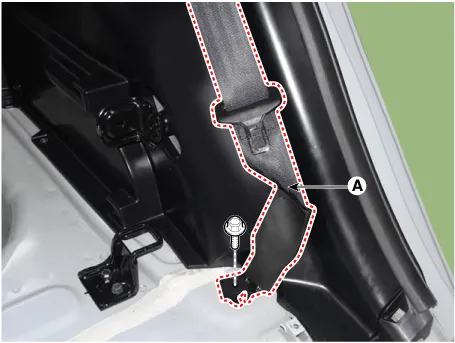
| 6. | Separate the rear seat belt lower anchor (A) after loosening the mounting bolt.
|
| 7. | Remove the folding bracket (A) after loosening the mounting bolts.
|

| 8. | Remove the luggage side trim (A) after loosening the mounting screws.
|

| 9. | Disconnect the luggage lamp connector (A).
|

| 10. | Remove the tailgate pillar trim (A).
|

| 11. | Install in the reverse order of removal.
|
Components and components location Component Location 1. Luggage side trim Repair procedures Replacement Put on gloves to protect your hands.
Other information:
Kia Picanto (JA) 2017-2026 Service & Repair Manual: Power Door Mirror Actuator
Components and components location Components 1. Side repeater lamp Repair procedures Inspection 1. Disconnect the negative (-) battery terminal. 2. Remove the front door quadrant inner cover (A). 3. Disconnect the tweeter speaker connector (A).
Kia Picanto (JA) 2017-2026 Service & Repair Manual: Heater Unit
Components and components location Component Location 1. Heater Unit Components [LH] 1. Heater Core Cover 2. Mode Control Actuator 3. Mode Control Actuator braket 4. Mode Cam 5. Mode Cam 6. Heater Core 7. Door Cover [Floor] 8. Heater Case [LH] [RH] 1.
Categories
- Manuals Home
- Kia Picanto Owners Manual
- Kia Picanto Service Manual
- Fuel Delivery System
- Normal Condition
- Heating,Ventilation, Air Conditioning
- New on site
- Most important about car

Copyright © 2026 www.kpicanto.com - 0.0257