Kia Picanto (JA): Crash Pad / Center Fascia Panel
Components and components location
| Component Location |

| 1. Center fascia panel assembly |
Repair procedures
| Replacement |
Put on gloves to protect your hands. |

|

| 1. | Remove the cluster fascia panel (A) by using a remover.
|

| 2. | Remove the center fascia garnish (A) by using a remover.
|

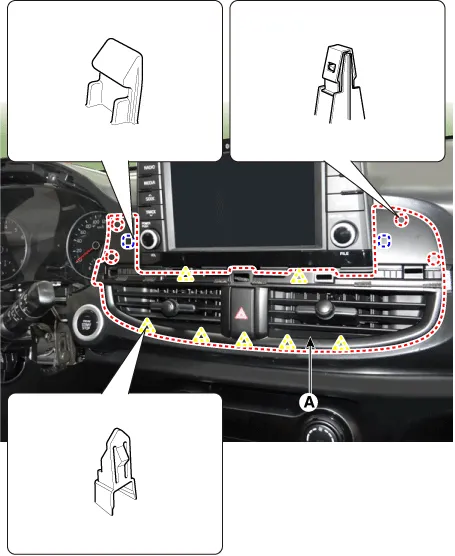
| 3. | Remove the center fascia panel (A) by using a remover.
|
| 4. | Remove the center fascia panel (B) after disconnecting the hazard switch connector (A).
|

| 5. | Install in the reverse order of removal.
|
Components and components location Component Location 1. Cluster fascia panel assembly Repair procedures Replacement Put on gloves to protect your hands.
Components and components location Component Location 1. Crash pad lower panel Repair procedures Replacement Put on gloves to protect your hands.
Other information:
Kia Picanto (JA) 2017-2026 Service & Repair Manual: Keyless Entry And Burglar Alarm
Specifications Specification Item Specification Power source 3 V Operating temperature -22 - 167°F (-30 - 75°C) RF Modulation FSK LF Modulation ASK RF frequency 433.92 MHz Button number 3 Function Door lock Door unlock Tailgate unlock Components and components locat
Kia Picanto (JA) 2017-2026 Service & Repair Manual: Map Lamp
Repair procedures Removal • Put on gloves to prevent hand injuries. • When removing with a flat-tip screwdriver or remover, wrap protective tape around the tools to prevent damage to components.
Categories
- Manuals Home
- Kia Picanto Owners Manual
- Kia Picanto Service Manual
- Front Disc Brake
- Automatic Transaxle Fluid
- Clutch Cable
- New on site
- Most important about car
