Kia Picanto (JA): Roof Trim / Roof Trim Assembly
Kia Picanto (JA) 2017-2026 Service & Repair Manual / Body (Interior and Exterior) / Roof Trim / Roof Trim Assembly
Components and components location
| Component Location |

| 1. Roof Trim Assembly |
Repair procedures
| Replacement |
Put on gloves to protect your hands. |

|

| 1. | Remove the front seat.
(Rear to Front Seat - "Front Seat Assembly")
|
| 2. | Remove the rear seat assembly.
(Rear to Rear Seat - "Rear Seat Assembly")
|
| 3. | Remove the front pillar trim.
(Rear to Interior Trim - "Front Pillar Trim")
|
| 4. | Remove the center pillar upper trim.
(Rear to Interior Trim - "Center Pillar Trim")
|
| 5. | Remove the rear pillar trim.
(Rear to Interior Trim - "Rear Pillar Trim")
|
| 6. | Remove the sun visor and retainer.
(Rear to Roof Trim - "Sun visor")
|
| 7. | Remove the assist handle.
(Rear to Roof Trim - "Assist Handle")
|
| 8. | Remove the overhead console lamp.
(Rear to Body Electrical System - "Map Lamp")
|
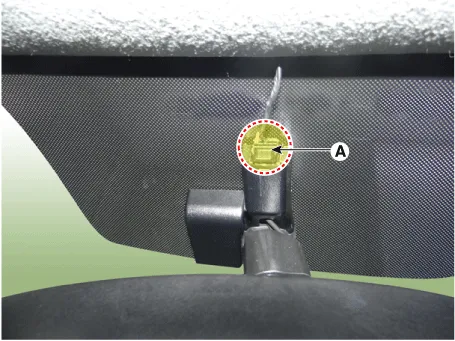
| 9. | Remove the ECM mirror cover (A).
|

| 10. | Disconnect the connector (A).
|
| 11. | Disconnect the roof trim main connector (A) and the mounting clips in the front pillar.
[Passenger side]
|

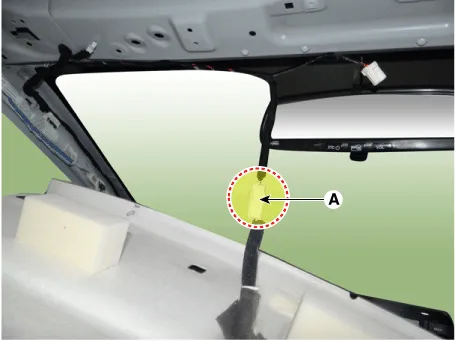
| 12. | Disconnect the wiring connector (A).
|
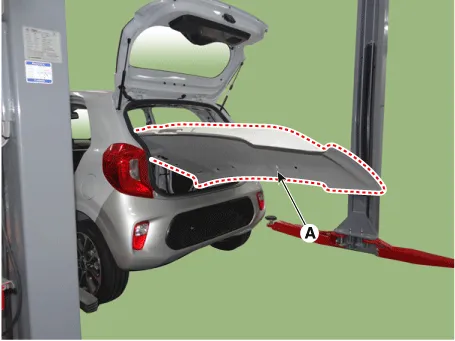
| 13. | Remove the roof trim assembly (A) from the vehicle through the tailgate.
|

| 14. | Install in the reverse order of removal.
|
Components and components location Component Location 1. Assist handle Repair procedures Replacement Put on gloves to protect your hands.
Repair procedures Adjustment 1. After loosening the tailgate hinge (A) mounting bolts, adjust the tailgate by moving it up and down, or right and left.
Other information:
Kia Picanto (JA) 2017-2026 Service & Repair Manual: Horn
Components and components location Component Location 1. Horn switch 2. Horn relay 3. Horn 4. Clock spring Repair procedures Removal 1.Disconnect the negative (-) battery terminal. 2.Remove the engine room under cover. G 1.
Kia Picanto (JA) 2017-2026 Service & Repair Manual: Rear Glass Defogger
C
Categories
- Manuals Home
- Kia Picanto Owners Manual
- Kia Picanto Service Manual
- Heating,Ventilation, Air Conditioning
- Engine Mechanical System
- Thermostat
- New on site
- Most important about car

Copyright © 2026 www.kpicanto.com - 0.0169