Kia Picanto (JA): Rear Seat / Rear Seat Back Cover
Components and components location
| Component Location |

| 1. Rear seat back cover [RH] | 2. Rear seat back cover [LH] |
Repair procedures
| Replacement |
Put on gloves to protect your hands. |

|

| 1. | Remove the rear seat assembly.
(Refer to Rear Seat - "Rear Seat Assembly")
|
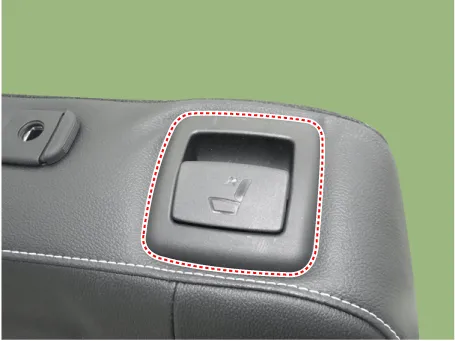
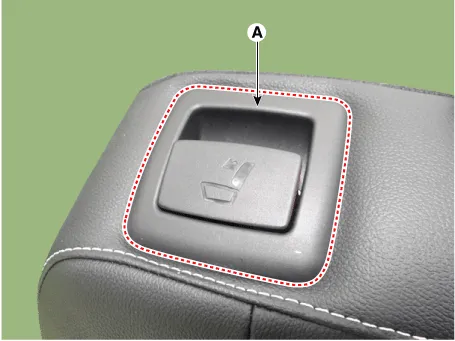
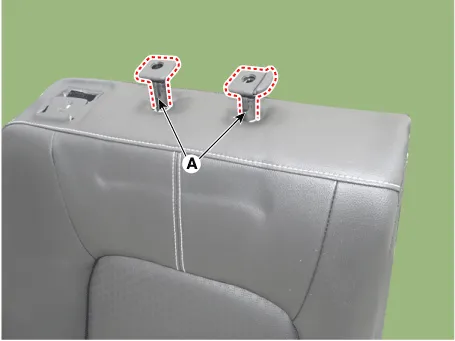
| 2. | Push the lock pin and remove the rear seat headrest (A).
|

| 3. | Remove the bezel upper cover (A) by using a remover.
|
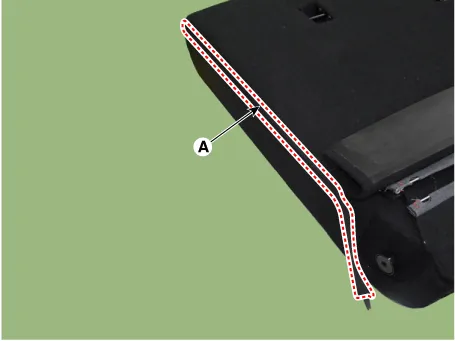
| 4. | Remove the rear seat back webbing guide (A) by using a remover.
|

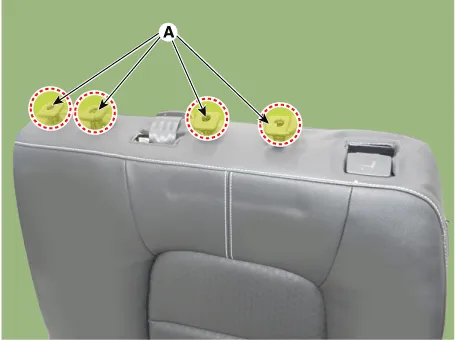
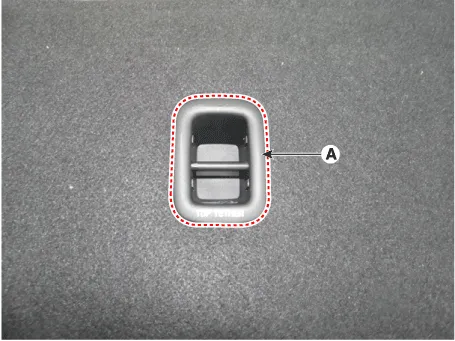
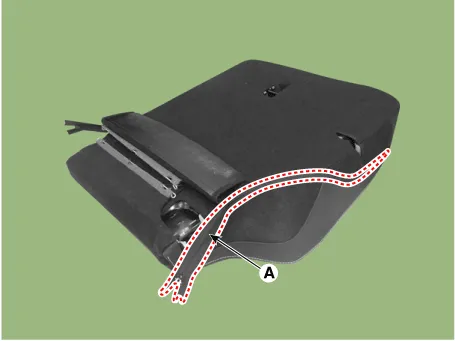
| 5. | Remove the child anchor cover (A) by using a remover.
|

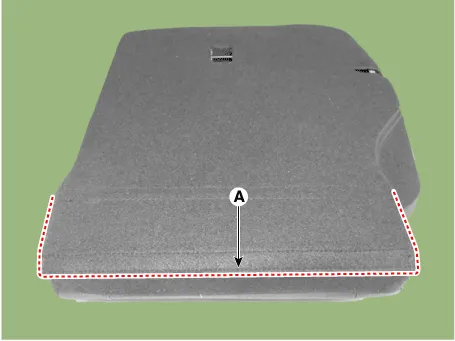
| 6. | Detach the rear seat back dust cover (A).
|

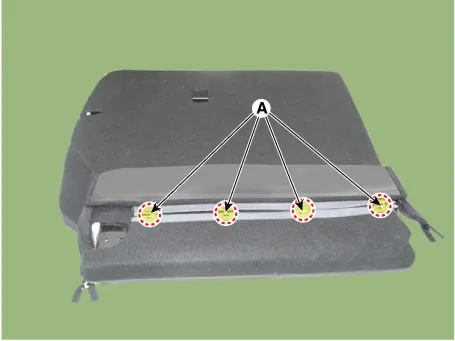
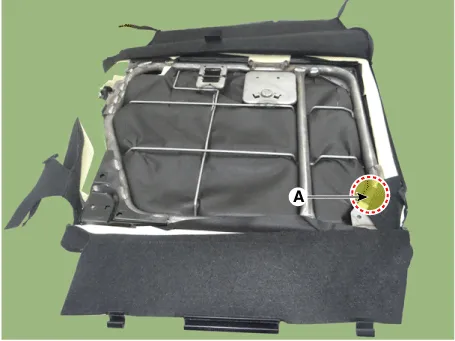
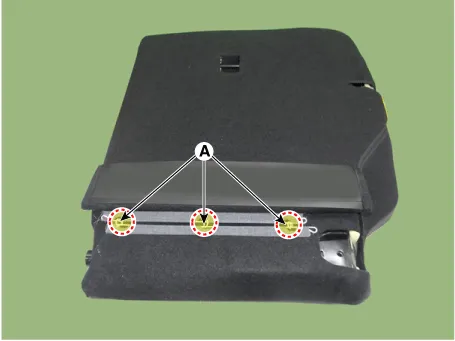
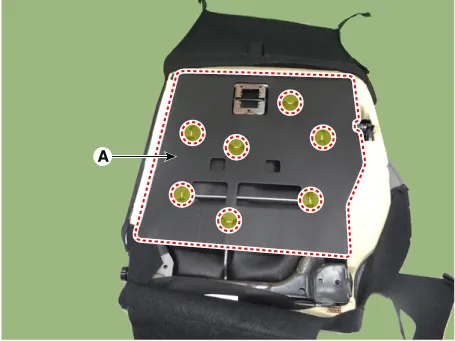
| 7. | Remove the rear seat lower mounting hog-ring clips (A).
|
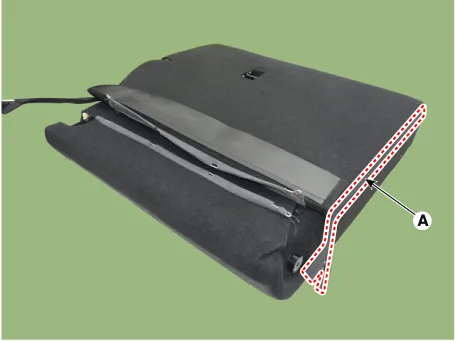
| 8. | Open the seat back side zipper (A).
[LH]
[LH]
|

| 9. | Detach the rear seat back cover mounting hook(A).
|

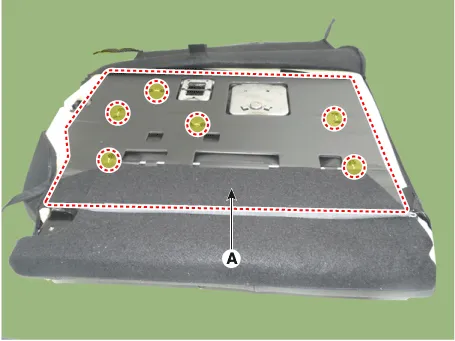
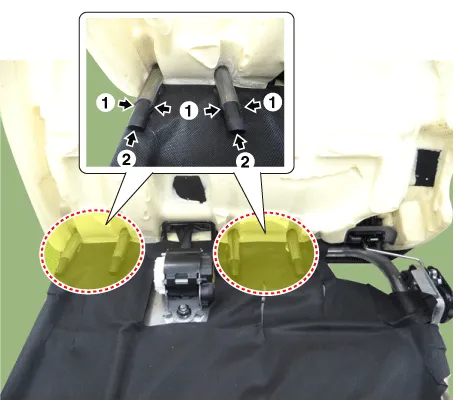
| 10. | Remove the back board (A) after removing the hog-ring clips.
|
| 11. | Detach the rear seat back cover side mounting hook(A).
|
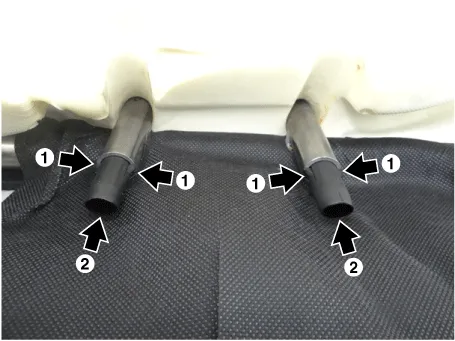
| 12. | Push the rear seat headrest guides (A) while pinching both sides of the lower part of the guides, and remove them.
|
| 13. | Remove the rear seat back cover from the frame. |
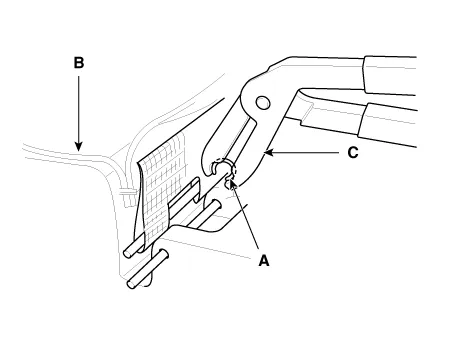
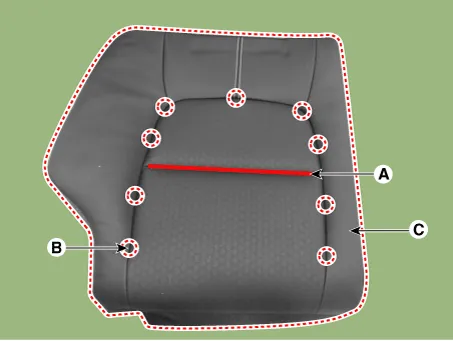
| 14. | Remove the front seat back covering (C) after removing the velcro tape (A) and hog-ring clip (B).
|

| 15. | Install in the reverse order of removal.
|
| 1. | Remove the rear seat assembly.
(Refer to Rear Seat - "Rear Seat Assembly")
|
| 2. | Push the lock pin and remove the rear seat headrest (A).
|

| 3. | Remove the bezel upper cover (A) by using a remover.
|
| 4. | Remove the child anchor cover (A) by using a remover.
|
| 5. | Detach the rear seat back dust cover (A).
|
| 6. | Remove the rear seat lower mounting hog-ring clips (A).
|
| 7. | Open the seat back side zipper (A).
[LH]
[LH]
|
| 8. | Detach the rear seat back cover mounting hook(A).
|

| 9. | Remove the back board (A) after removing the hog-ring clips.
|
| 10. | Detach the rear seat back cover side mounting hook(A).
|

| 11. | Push the rear seat headrest guides (A) while pinching both sides of the lower part of the guides, and remove them.
|
| 12. | Remove the rear seat back cover from the frame. |
| 13. | Remove the front seat back covering (C) after removing the velcro tape (A) and hog-ring clip (B).
|
| 14. | Install in the reverse order of removal.
|
Components and components location Component Location 1. Rear seat cushion assembly 2. Rear seat back assembly Repair procedures Replacement Put on gloves to protect your hands.
Components and components location Component Location 1. Rear seat cushion cover Repair procedures Replacement Put on gloves to protect your hands.
Other information:
Kia Picanto (JA) 2017-2026 Service & Repair Manual: Junction Box (Passenger Compartment)
Components and components location Component Location I/P Junction Box Circuit (I/P Junction Box) Description and operation Description Communication Network Diagram Abbreviation Explanation ABS Anti-lock Brake System ACU Airbag Control Un
Kia Picanto (JA) 2017-2026 Service & Repair Manual: Rear Glass Defogger
C
Categories
- Manuals Home
- Kia Picanto Owners Manual
- Kia Picanto Service Manual
- Cylinder Head
- Cooling System
- Engine Mechanical System
- New on site
- Most important about car
