Kia Picanto (JA): Hood / Hood Latch
Components and components location
| Component Location |
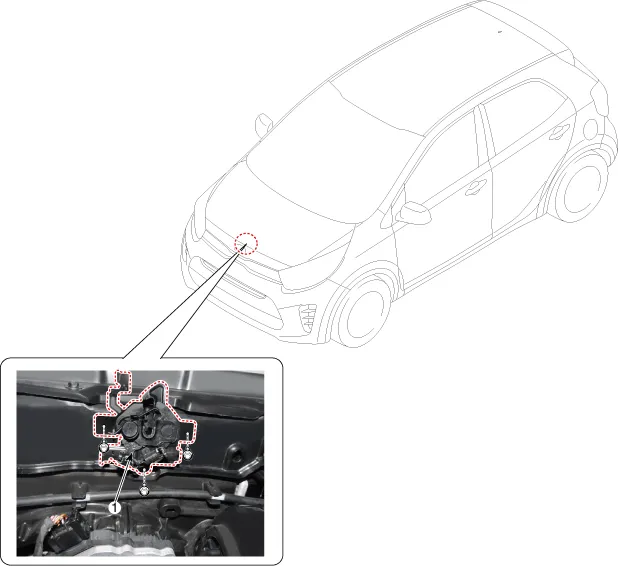
| 1. Hood lower latch assembly |
Repair procedures
| Replacement |
| 1. | Disconnect the hood latch connector (A).
|
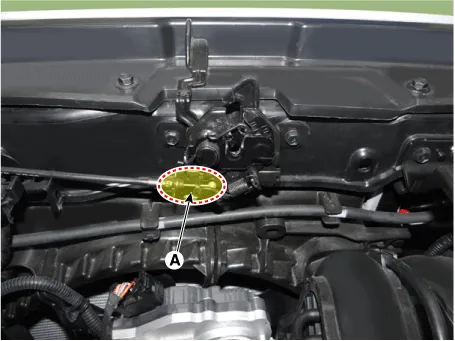
| 2. | Remove the hood lower latch assembly (A) after loosening the bolts.
|

| 3. | Install in the reverse order of removal.
|

Components and components location Component Location 1. Hood latch release handle Repair procedures Replacement 1. Using a remover, remove the hood release handle (A).
Components and components location Components 1. Front pillar trim assembly 2. Front door scuff trim assembly 3. Center pillar upper trim assembly 4.
Other information:
Kia Picanto (JA) 2017-2026 Service & Repair Manual: Power Door Mirror Switch
Components and components location Component Schematic diagrams Circuit Diagram [Folding Mirror Type] [Non-Folding Mirror Type] Repair procedures Inspection 1.Check for continuity between the terminals in each switch position according to the table.
Kia Picanto (JA) 2017-2026 Service & Repair Manual: Rear Glass Defogger Switch
Repair procedures Inspection 1.In the body electrical system, failure can be quickly diagnosed by using the vehicle diagnostic system (KDS/GDS).The diagnostic system (KDS/GDS) provides the following information.(1)Self diagnosis : Checking failure and code number (DTC)(2) Current data : Checking the system input/output data state (3)Actuation
Categories
- Manuals Home
- Kia Picanto Owners Manual
- Kia Picanto Service Manual
- Automatic Transaxle Fluid
- Cylinder Head
- Engine Control / Fuel System
- New on site
- Most important about car
