Kia Picanto (JA): Body (Interior and Exterior) / Floor Carpet
Components and components location
| Component Location |

| 1. Floor carpet assembly |
Repair procedures
| Replacement |
Put on gloves to protect your hands. |

|

| 1. | Remove the console front complete assembly.
(Refer to Floor Console - "Floor Console Assembly")
|
| 2. | Remove the accelerator pedal.
(Refer to Engine Control System - "Accelerator Position Sensor (APS)")
|
| 3. | Remove the front seat assembly.
(Refer to Front Seat - "Front Seat Assembly")
|
| 4. | Remove the rear seat assembly.
(Refer to Rear Seat - "Rear Seat Assembly")
|
| 5. | Remove the front door scuff trim (A) by using a remover.
|

| 6. | Remove the hood latch release handle (A) by using a remover.
|

| 7. | Remove the cowl side trim (A) by using a remover.
|
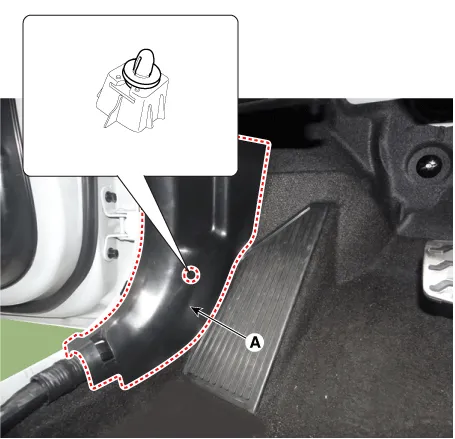
| 8. | Remove the rear door scuff trim (A) after loosening the screws.
|

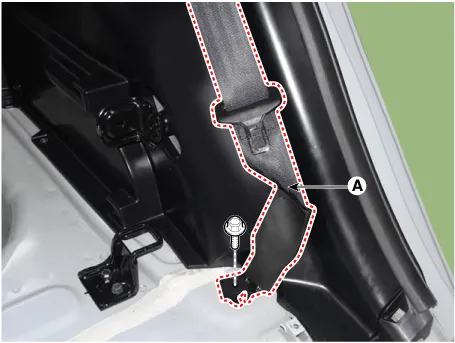
| 9. | Disconnect the seat belt (B) from the EFD system (A).
|

| 10. | Remove the center pillar lower trim (A) by using a remover.
|

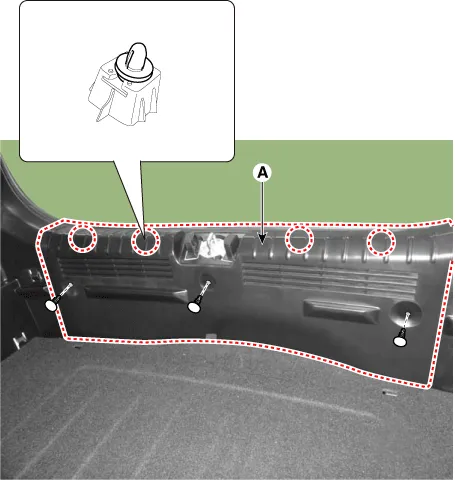
| 11. | Remove the luggage board (A).
|

| 12. | Remove the rear transverse trim (A).
|
| 13. | Separate the rear seat belt lower anchor (A) after loosening the mounting bolt.
|
| 14. | Remove the rear seat folding bracket (A) after loosening the bolts.
|

| 15. | Remove the luggage side trim (A) after loosening the mounting screws.
|

| 16. | Disconnect the luggage lamp connector (A).
|

| 17. | Remove the floor carpet (A).
|

| 18. | Install in the reverse order of removal.
|
Components and components location Component Location 1. Fender assembly Repair procedures Replacement • Be careful not to damage the fender and body.
Components and components location Components [M/T] 1. Floor console assembly 2. Rear console tray mat 3. Parking brake cover 4. Floor console front bezel assembly 5.
Other information:
Kia Picanto (JA) 2017-2026 Service & Repair Manual: Power Door Mirrors
C
Kia Picanto (JA) 2017-2026 Service & Repair Manual: Windshield Wiper-Washer Switch
Repair procedures Removal 1.Disconnect the negative (-) battery terminal. 2.Remove the steering column upper and lower shrouds after loosening the screws. (Refer to Body - "Steering Column Shroud Panal") 3.Disconnect the wiper switch / washer switch connector (A).
Categories
- Manuals Home
- Kia Picanto Owners Manual
- Kia Picanto Service Manual
- Automatic Transaxle Fluid
- Engine Oil and Filter
- Cooling System
- New on site
- Most important about car

Copyright © 2026 www.kpicanto.com - 0.0204