Kia Picanto (JA): Rear Door / Rear Door Window Glass
Components and components location
| Component Location |
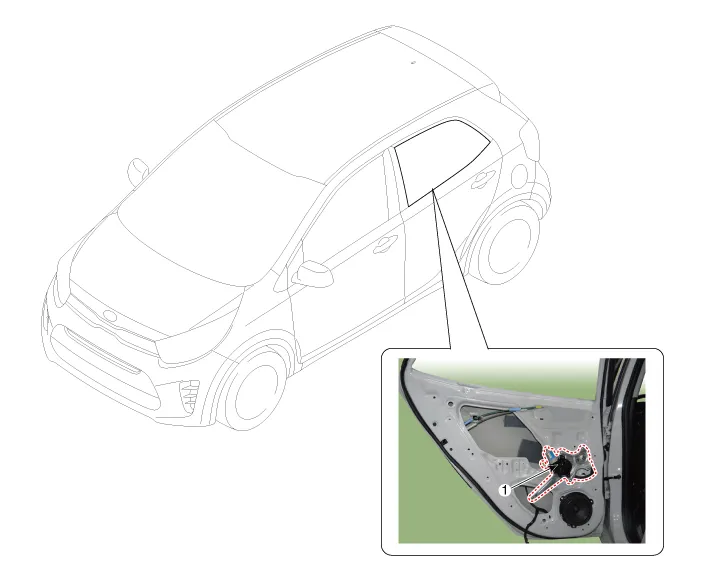
| 1. Rear door window glass |
Repair procedures
| Replacement |
Put on gloves to protect your hands. |

|

| 1. | Remove the rear door trim.
(Refer to Rear Door - "Rear Door Trim")
|
| 2. | Separate the inside handle (A) after loosening the mounting screw.
|

| 3. | Remove the front door inside handle (B) after disconnecting the cable (A).
|
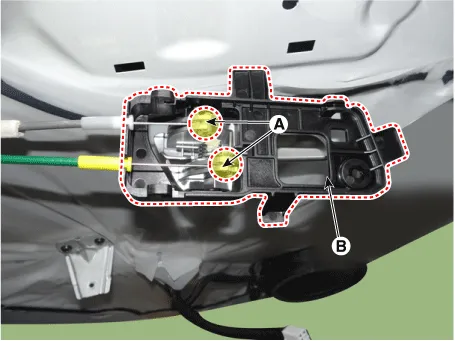
| 4. | Remove the rear door trim mounting bracket (A) after loosening the screws.
|

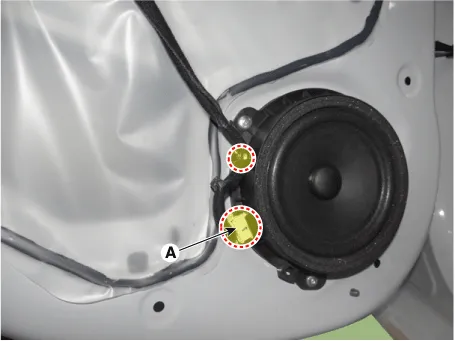
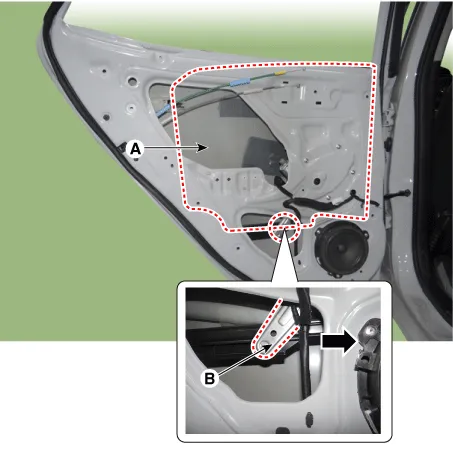
| 5. | Disconnect the rear door speaker connector (A), and then remove the wiring mounting clips.
|
| 6. | Remove the front door trim seal (A).
|

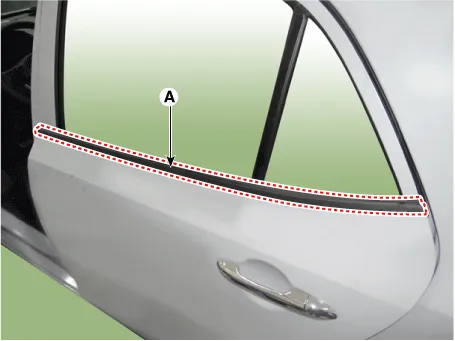
| 7. | Remove the front door belt inside weather strip (A).
|

| 8. | Remove the front door belt outside weather strip (A).
|
| 9. | Separate the door side weatherstrip (A).
|

| 10. | Remove the quarter fixed glass & molding (A) after loosening the mounting screw and bolts.
|

| 11. | Remove the door window glass after sliding it in the direction of the arrow.
|
| 12. | Install in the reverse order of removal.
|
Repair procedures Replacement Put on gloves to protect your hands. • Use a plastic panel removal tool to remove interior trim pieces without marring the surface.
Components and components location Component Location 1. Rear door module Repair procedures Replacement Put on gloves to protect your hands.
Other information:
Kia Picanto (JA) 2017-2026 Service & Repair Manual: Body Control Module (BCM)
Specifications Specifications [BCM Type] Items Specifications Rated voltage DC 12 V Operating voltage DC 9 - 16 V Operating temperature -31 - 167°F (-35 - 75°C) Dark current SMK : 3mA / Keyless : 3.
Kia Picanto (JA) 2017-2026 Service & Repair Manual: Lighting System
Specifications Specification Item Type Bulb Watt (W) Front Headlamp Halogen (Position lamp) Low/High H4 LL 55/60 Turn signal lamp PY21WLL 21 Position lamp W5WLL 5 Halogen (Position lamp + DRL) Low/High HB3 (9005HL+) 60 Turn signal lamp LED LED Po
Categories
- Manuals Home
- Kia Picanto Owners Manual
- Kia Picanto Service Manual
- Battery
- Heating,Ventilation, Air Conditioning
- Engine Control / Fuel System
- New on site
- Most important about car
