
Kia Picanto (JA): Rear Bumper / Rear Bumper Assembly
Components and components location
| Component Location |

| 1. Rear bumper cover |
Repair procedures
| Replacement |
Put on gloves to protect your hands. |

|

| 1. | Separate the rear combination lamp (A) after loosening the mounting screws.
|

| 2. | Disconnect the watherproof seal (A).
|

| 3. | Disconnect the rear combination lamp connector (A).
|

| 4. | Loosen the rear bumper upper mounting fastener.
|

| 5. | Remove the rear bumper side after loosening the mounting screws.
|
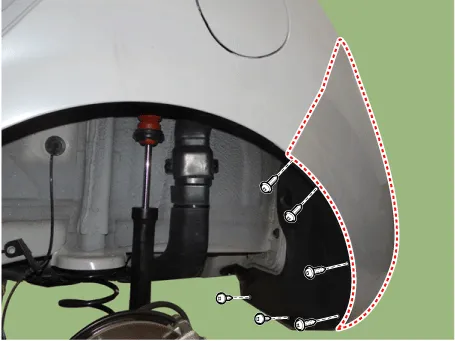
| 6. | Detach the rubber hangers (A) from the muffler (B).
|


| 7. | Loosen the rear bumper lower mounting bolts.
[LH]
[RH]
|

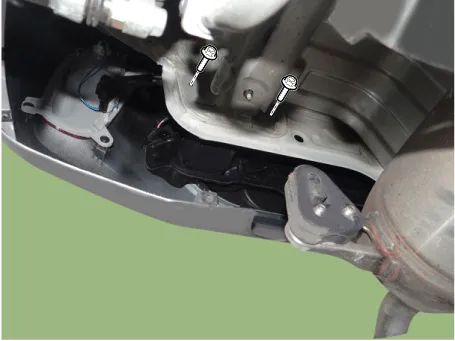
| 8. | Disconnect the rear bumper wiring connector (A).
|

| 9. | Remove the rear bumper assembly (A).
|

| 10. | Install in the reverse order of removal.
|
Components and components location Components 11. Rear bumper cover assembly 2. Rear bumper beam 3. Rear bumper side mounting bracket [LH]
Components and components location Component Location 1. Rear bumper beam assembly Repair procedures Replacement Put on gloves to protect your hands.
Other information:
Kia Picanto (JA) 2017-2026 Service & Repair Manual: Emergency Call (eCall) Unit
Components and components location Component The eCall unit for AVN is equipped in AVN head unit. Repair procedures Removal Carry out the Test Mode in the following cases.– Replacing the eCall unit– Replacing the Bac
Kia Picanto (JA) 2017-2026 Service & Repair Manual: Evaporator Core
Repair procedures Replacement 1.Disconnect the negative (-) battery terminal. 2.Remove the heater unit. (Refer to Heater - "Heater Unit") 3.Remove the Evaporator temperature sensor. (Refer to Air Conditioning System - "Evaporator Temperature Sensor") 4.
Categories
- Manuals Home
- Kia Picanto Owners Manual
- Kia Picanto Service Manual
- Suspension System
- Charging System
- Body Control Module (BCM)
- New on site
- Most important about car
