
Kia Picanto (JA): AVN System / AVN Remote Controller
Components and components location
| Components |
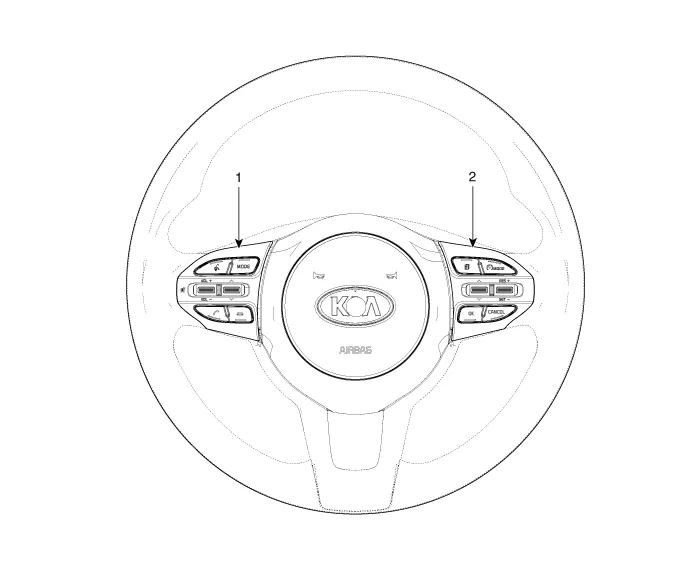
| 1. Left Remote Control Switch (Audio + Hands free + Voice) | 2. Right Remote Control Switch (Cruise+Trip Computer) |
Schematic diagrams
| Circuit Diagram |

| [Audio] |

| [Audio + Bluetooth] |
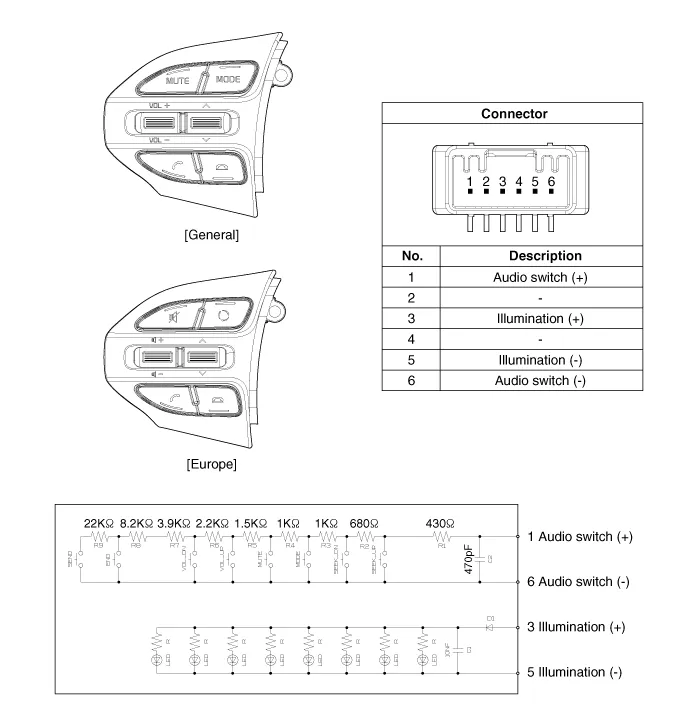
| [Audio + Bluetooth + Voice] |

| [Trip (2 Button) + SEG LCD Cluster] |
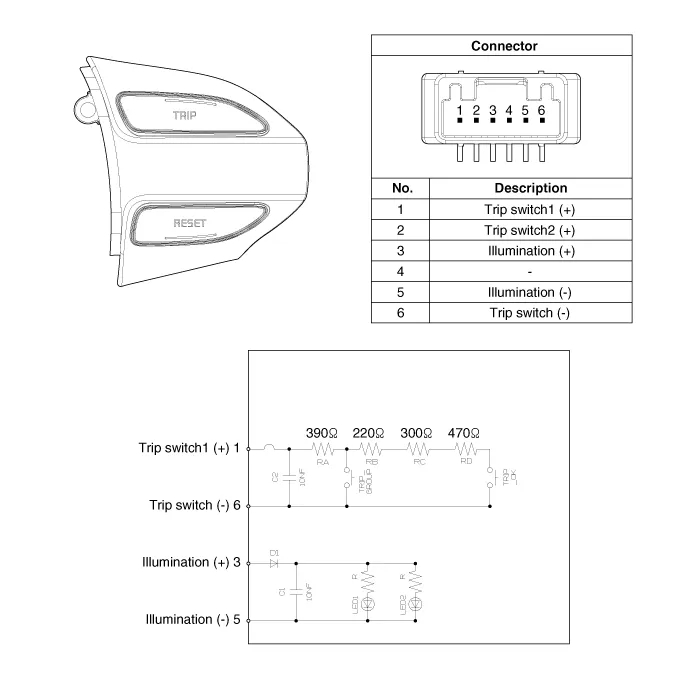
| [Trip (2 Button) + ACC] |
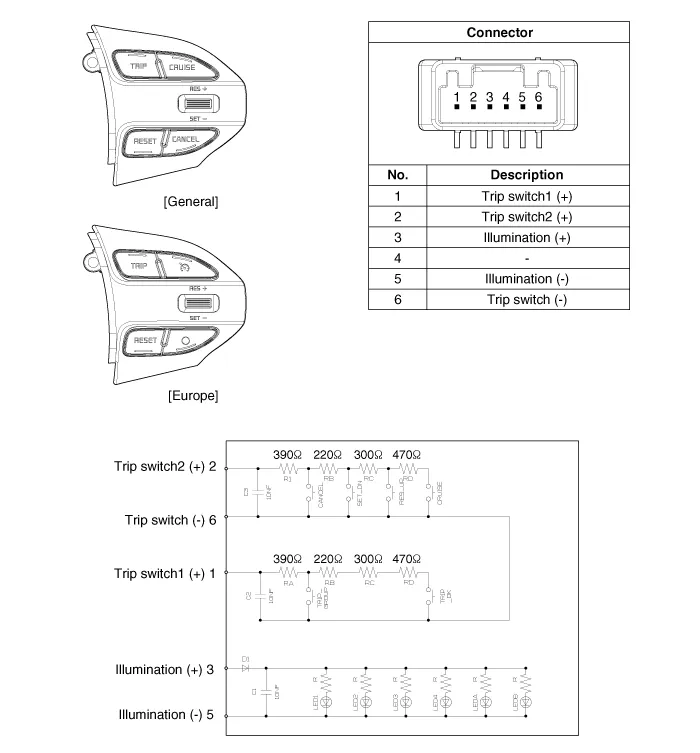
| [Trip (2 Button) + ACC + SLD] |
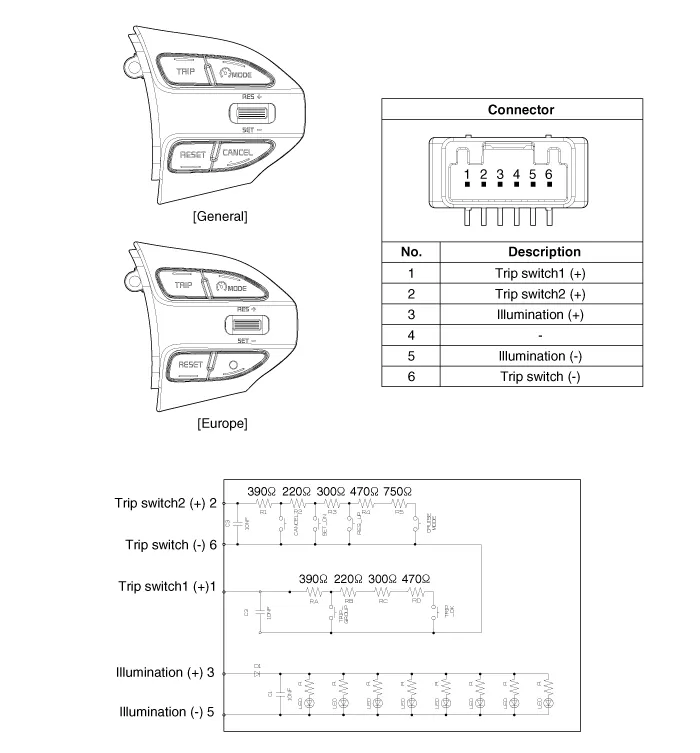
| [Trip (4 Button) + DOT&TFT LCD Cluster] |
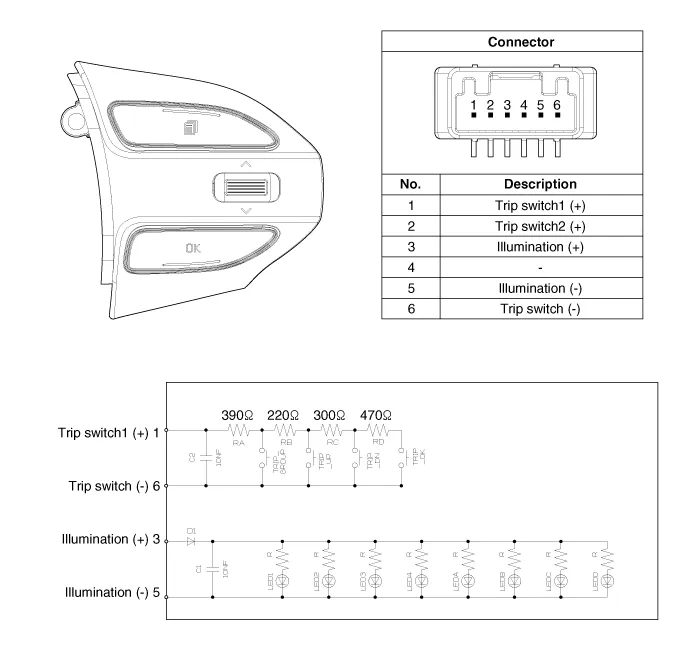
| [Trip (4 Button) + ACC] |
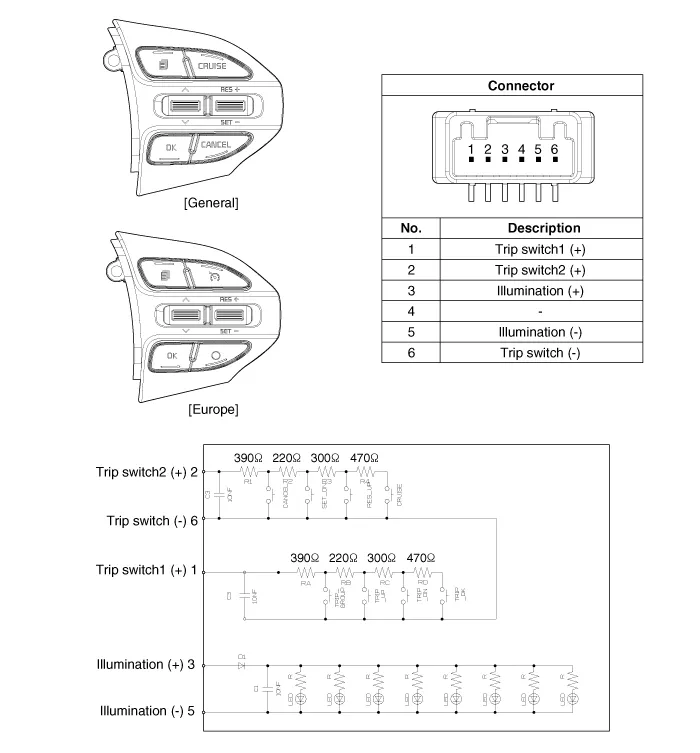
| [Trip (4 Button) + ACC + SLD] |
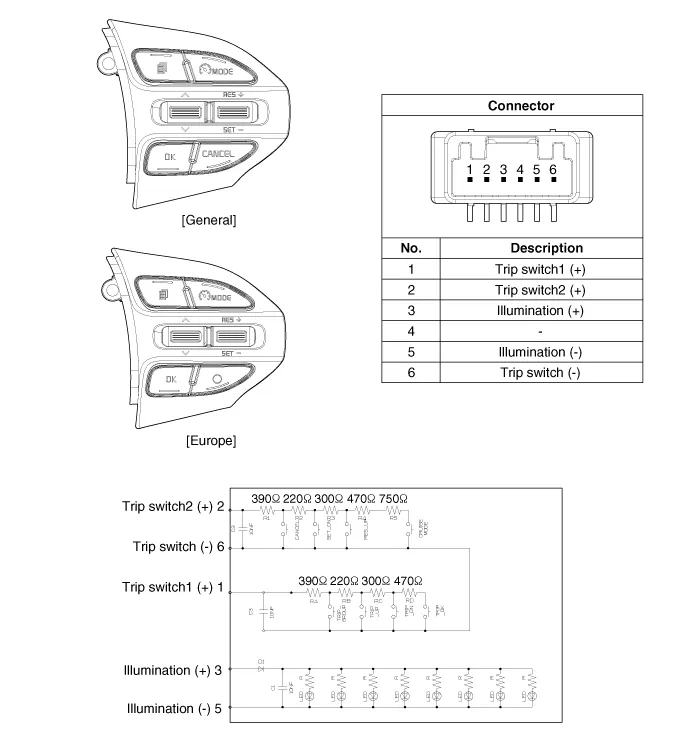
Repair procedures
| Removal |
| 1. | Disconnect the negative (-) battery terminal. |
| 2. | Remove the steering wheel assembly.
(Refer to Steering System - "Steering Wheel")
|
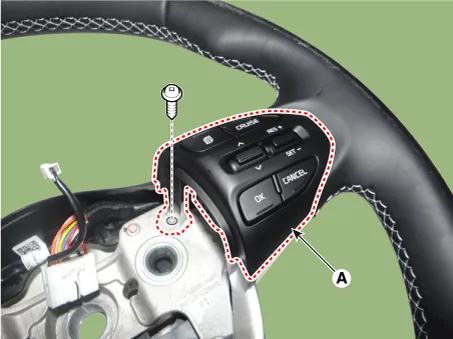
| 3. | Remove the steering wheel remote control (A) after loosening the mounting screws. [LH]
[RH]
|

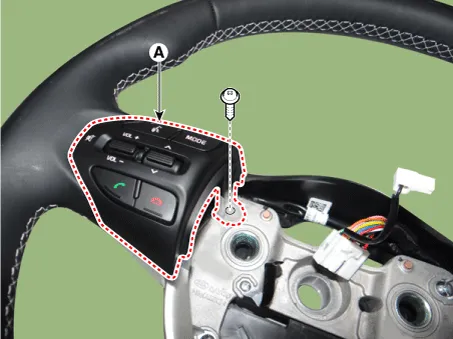

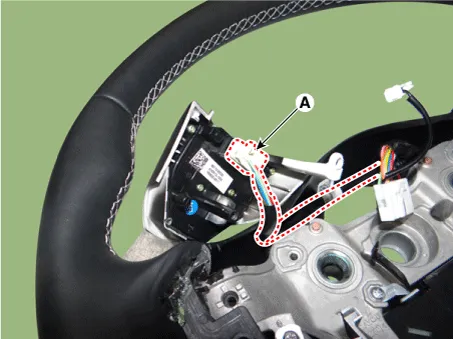
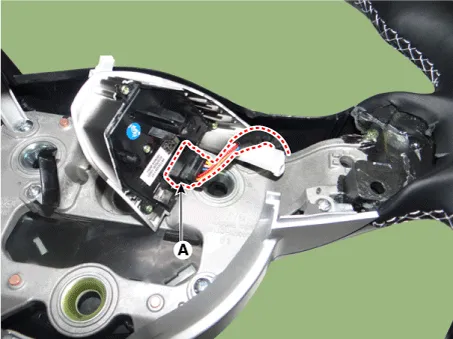
| 4. | Disconnect the steering wheel remote control connector (A). [LH]
[RH]
|
| Installation |
| 1. | Connect the steering wheel remote control connector. |
| 2. | Install the steering wheel remote control. |
| 3. | Install the steering wheel and driver airbag module. |
| 4. | Connect the negative (-) battery terminal. |
| Inspection |
| 1. | Check for resistance between terminals in each switch position (LH).
[LH : Audio + Hands free + Voice]
|

| 2. | Check for resistance between terminals in each switch position (RH).
[RH : Cruise + Trip]
|

Components and components location Components [Roof Antenna (Radio+GPS/GNSS+DAB+GSM)] Repair procedures Removal Roof antenna 1.
Schematic diagrams Circuit Diagram Description and operation Description The multimedia jack on the console upper cover is for customers who like to listen to external portable music players like the MP3 etc.
Other information:
Kia Picanto (JA) 2017-2026 Service & Repair Manual: Power Door Mirror Switch
Components and components location Component Schematic diagrams Circuit Diagram [Folding Mirror Type] [Non-Folding Mirror Type] Repair procedures Inspection 1.Check for continuity between the terminals in each switch position according to the table.
Kia Picanto (JA) 2017-2026 Service & Repair Manual: Power Window Motor
Components and components location Components [Standard Window Motor] [Safety Window Motor] Repair procedures Inspection • When removing with a flat-tip screwdriver or remover, wrap protective tape around the tools to prevent damage to components.
Categories
- Manuals Home
- Kia Picanto Owners Manual
- Kia Picanto Service Manual
- Cooling System
- Engine Mechanical System
- Body Control Module (BCM)
- New on site
- Most important about car
