Kia Picanto (JA): Intake And Exhaust System / Muffler
Components and components location
| Components |

| 1. Front muffler 2. Catalytic converter & Center muffler assembly 3. Rear muffler | 4. Rubber hanger 5. Gasket |
Repair procedures
| Removal and Installation |
| 1. | Disconnect the negative battery terminal. |
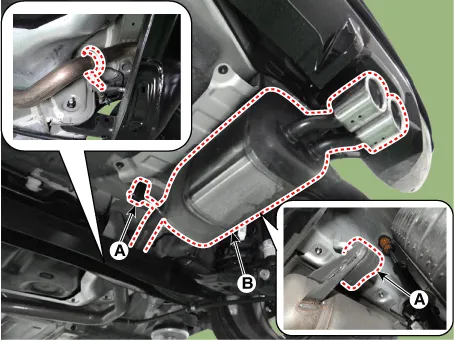
| 2. | Disconnect the heated oxygen sensor connector (A) and then remove them from the bracket.
|

| 3. | Detach the rubber hanger (A) from the front muffler. |
| 4. | Remove the front muffler (B).
|

| 5. | Install in the reveres order of removal.
|

| 1. | Detach the rubber hanger (A) from the catalytic converter & center muffler assembly. |
| 2. | Remove the catalytic converter & center muffler assembly (B).
|

| 3. | Install in the reveres order of removal.
|
| 1. | Detach the rubber hanger (A) from the rear muffler. |
| 2. | Remove the rear muffler (B).
|
| 3. | Install in the reveres order of removal.
|
| 1. | Check if the clamping part of the center muffler assembly is damaged or deformed. If the muffler is excessively corroded to clamp, replace the center muffler assembly.
|
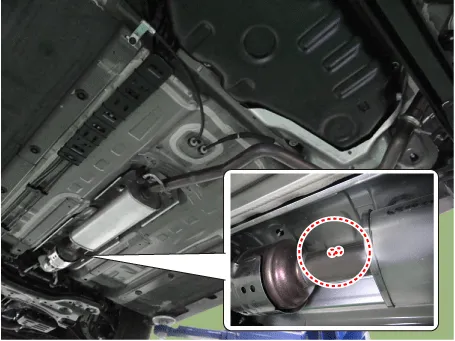
| 2. | Record the gap (A, B) between the tail pipe and the rear bumper.
|

| 3. | Detach the rubber hanger (A) from the center muffler. |
| 4. | Remove the catalytic converter & center muffler (B).
|
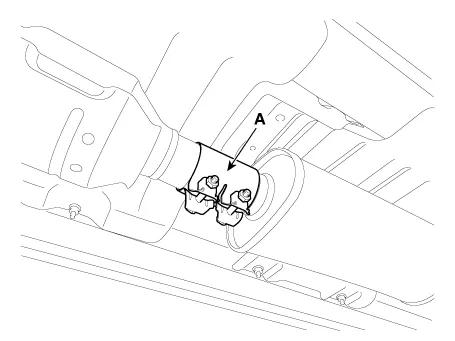
| 5. | Cut the center muffler as instructed below. - Cut the front groove of the muffler.
[Replacement muffler] -Cut the rear groove on the replacement muffler.
|


| 6. | Install the center muffler.
|

Components and components location Components 1. Intercooler air guard 2. Intercooler 3. Recirculation valve (RCV) control solenoid valve & vacuum hose 4.
Other information:
Kia Picanto (JA) 2017-2026 Service & Repair Manual: Headlamp Leveling Actuator
Components and components location Components Repair procedures Removal 1.Disconnect the negative (-) battery terminal. 2.Remove the headlamp assembly. (Refer to Lighting System - "Headlamps") Installation 1.Install the headlamp assembly.
Kia Picanto (JA) 2017-2026 Service & Repair Manual: Heater & A/C Control Unit(Manual)
Components and components location Components [NON ISG] Connector pin function No. Connector A Connector B 1 Low Battery 2 Common Illumination (+) 3 Ground HTD 4 Middle (Low) ISG Battery 5 Middle (High) - 6 High Detent out (-) 7 - 8 Sen
Categories
- Manuals Home
- Kia Picanto Owners Manual
- Kia Picanto Service Manual
- Fuel Delivery System
- Brake System
- Engine Oil and Filter
- New on site
- Most important about car
