Kia Picanto (JA): Engine Control System / RCV Control Solenoid Valve
Specifications
Item
|
Specification
|
Coil Resistance(Ω)
| 28.3 - 31.1 [20°C(68°F)]
|
Pin
| 2
|
Description and operation
Installed
on the cooling pan motor top, the RCV (Recirculation Valve) Control
Solenoid Valve operates the RCV actuator to control the by-pass passage
of the turbocharger compressor.
When
the throttle valve is closed during engine running [Tip-out], crash
noise will be generated from the impeller due to rapid surge in boost
pressure. So, in this case, in order to prevent this phenomenon, ECM
maintains the appropriate boost pressure by opening the by-pass passage.
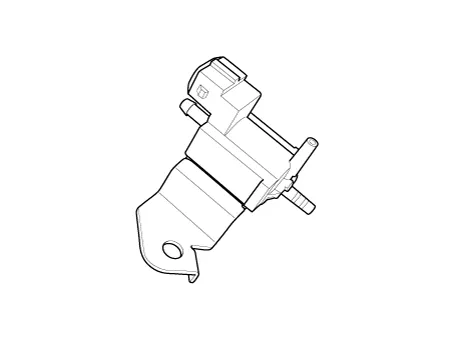
Schematic diagrams


Repair procedures
| 1. | Turn the ignition switch OFF. |
| 2. | Disconnect the RCV connector. |
| 3. | Measure resistance between the RCV terminals 1 and 2. |
| 4. | Check that the resistance is within the specification.
Specification: 28.3-31.1 [20°C(68°F)] |
|
| 1. | Turn the ignition switch OFF and disconnect the battery negative (-) terminal. |
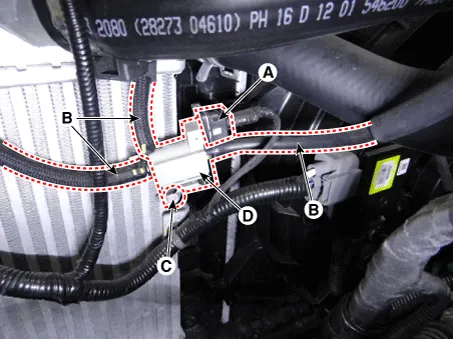
| 2. | Disconnect the RCV control solenoid valve connector (A) and vapor hoses (B). |
| 3. | Remove the RCV control solenoid valve (D) by loosening the mounting bolt (C).
RCV control solenoid valve bracket mounting bolt:
9.8 - 11.8 N·m (1.0 - 1.2 kgf·m, 7.2 - 8.7 lb·ft) |
 |
| •
| Install the component to the specified torques. |
| •
| Note
that internal damage may occur when the component is dropped. If the
component has been dropped, inspect before installing. |
|
| 1. | Install in the reverse order of removal. |
Specifications
Specification
Motor
Item
Specification
Max Current (A) < 6.
Specifications
Specification
Item
Specification
Coil Resistance (Ω) 0.
Other information:
Schematic diagrams
Circuit Diagram
Description and operation
Description
The
multimedia jack on the console upper cover is for customers who like to
listen to external portable music players like the MP3 etc., through
the vehicle's sound system when it is linked to this jack.
Repair procedures
Inspection
Rear Wiper Motor
1.Remove the connector from the rear wiper motor.
2.Connect positive (+) battery cables to terminal 1 and negative (-) battery cables to terminal 2 respectively.
3.Check that the motor operates normally.


