Kia Picanto (JA): Hood / Hood Latch
Components and components location
| Component Location |
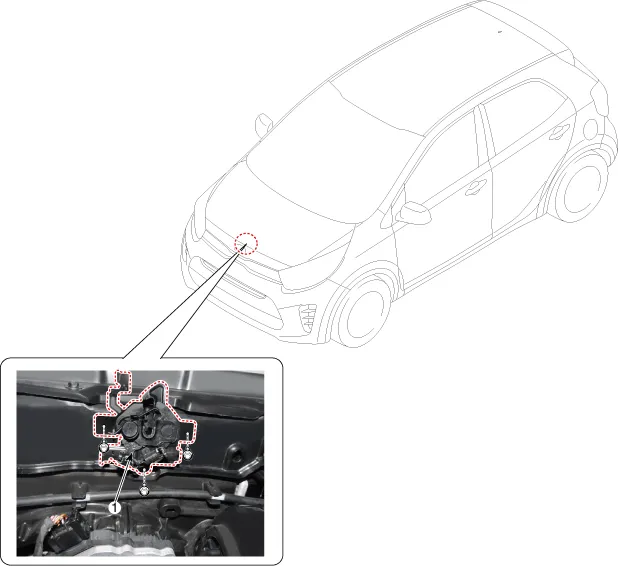
| 1. Hood lower latch assembly |
Repair procedures
| Replacement |
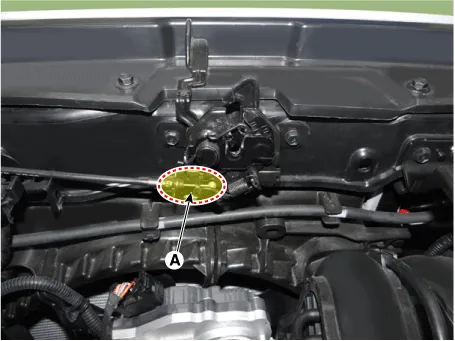
| 1. | Disconnect the hood latch connector (A).
|
| 2. | Remove the hood lower latch assembly (A) after loosening the bolts.
|

| 3. | Install in the reverse order of removal.
|

Components and components location Component Location 1. Hood latch release handle Repair procedures Replacement 1. Using a remover, remove the hood release handle (A).
Components and components location Components 1. Front pillar trim assembly 2. Front door scuff trim assembly 3. Center pillar upper trim assembly 4.
Other information:
Kia Picanto (JA) 2017-2026 Service & Repair Manual: Electro Chromic Inside Rear View Mirror
Components and components location Components Description and operation Description The ECM (Electro Chromatic inside rear view Mirror) is one that automatically dims to protect the driver’s eyes when it senses light reflecting from the car behind.
Kia Picanto (JA) 2017-2026 Service & Repair Manual: Heater & A/C Control Unit(Manual)
Components and components location Components [NON ISG] Connector pin function No. Connector A Connector B 1 Low Battery 2 Common Illumination (+) 3 Ground HTD 4 Middle (Low) ISG Battery 5 Middle (High) - 6 High Detent out (-) 7 - 8 Sen
Categories
- Manuals Home
- Kia Picanto Owners Manual
- Kia Picanto Service Manual
- Fuel Delivery System
- Automatic Transaxle Fluid
- Engine Control / Fuel System
- New on site
- Most important about car
