Kia Picanto (JA): Front Seat / Front Seat Assembly
Components and components location
| Component Location |

| 1. Front seat assembly |
Repair procedures
| Replacement |
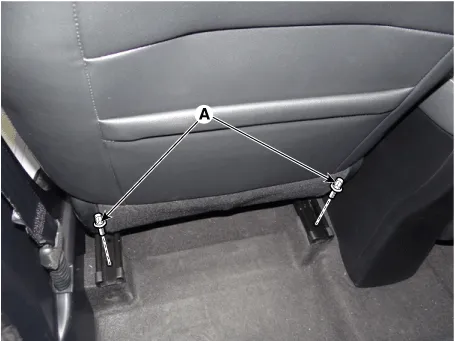
| 1. | Loosen the front seat mounting bolts (A).
[Front]
[Rear]
|

| 2. | Disconnect the airbag connector (A), seat heater connector (B), front seat belt buckle connector (C).
[Driver side]
[Passenger side]
|


| 3. | Install in the reverse order of removal.
|

Components and components location Components 1. Front seat inner shield cover 2. Front seat headrest 3. Front seat back covering 4.
Components and components location Component Location 1. Front seat shield outer cover Repair procedures Replacement Put on gloves to protect your hands.
Other information:
Kia Picanto (JA) 2017-2026 Service & Repair Manual: License Lamps
Repair procedures Removal 1. Disconnect the negative (-) battery terminal. 2. Remove the license lamp assembly (A) after pressing the locking pin. 3. Disconnect the license lamp connector (A). 4. Remove the license lamp bulb (B) after removing the license lamp socket (A).
Kia Picanto (JA) 2017-2026 Service & Repair Manual: Rear Washer Switch
Repair procedures Inspection Multifunction Switch Inspection 1. Check for continuity between the terminals in each switch position as shown below. Rear Wiper & Washer Switch[LHD] [RHD] Inspection (With KDS/GDS) 1. In the body electrical system, failure can be quickly diagnosed by using the vehicle diagnostic system (KDS/GDS).
Categories
- Manuals Home
- Kia Picanto Owners Manual
- Kia Picanto Service Manual
- Battery
- Clutch Cable
- Cooling System
- New on site
- Most important about car
