Kia Picanto: Driveshaft Assembly / Dynamic Damper
Kia Picanto JA 2017-2025 Service & Repair Manual / Driveshaft and axle / Driveshaft Assembly / Dynamic Damper
Components and components location
| Components |
| [RH] |
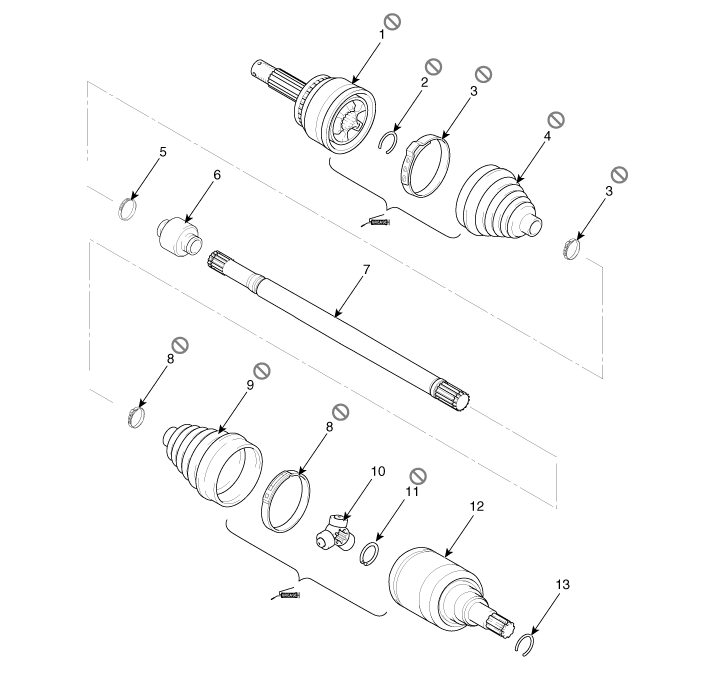
| 1. BJ assembly 2. Clip 3. BJ boot band 4. BJ boot | 5. Dynamic damper band 6. Dynamic damper 7. Shaft 8. TJ boot band | 9. TJ boot 10. Spider assembly 11. Circlip 12. TJ housing | 13. Circlip |
| [LH] |
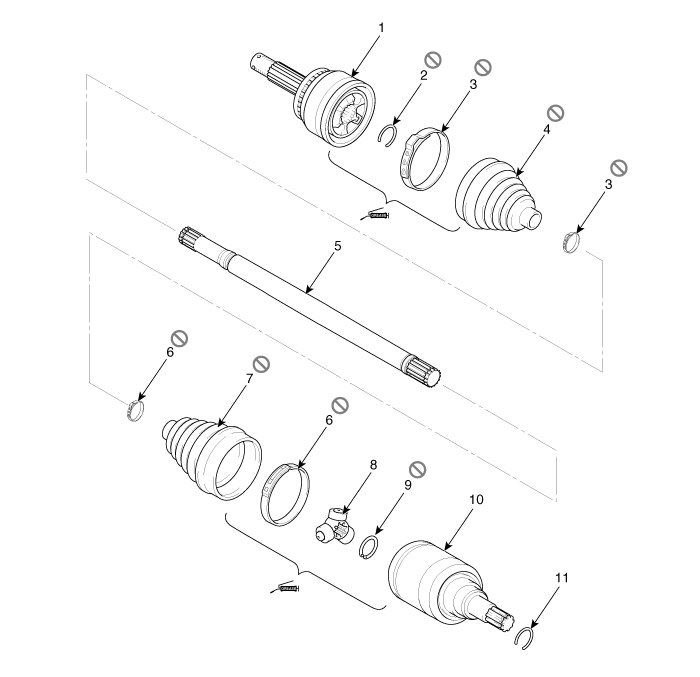
| 1. BJ assembly 2. BJ circlip 3. BJ boot band 4. BJ boot | 5. Shaft 6. TJ boot band 7. TJ boot 8. Spider assembly | 9. Snap ring 10. TJ case 11. Circlip |
Repair procedures
| Replacement |
| 1. | Remove the front driveshaft.
(Refer to Driveshaft and axle - “Front Driveshaft”)
|
| 2. | Remove the TJ joint assembly.
(Refer to Driveshaft and axle - “TJ joint”)
|
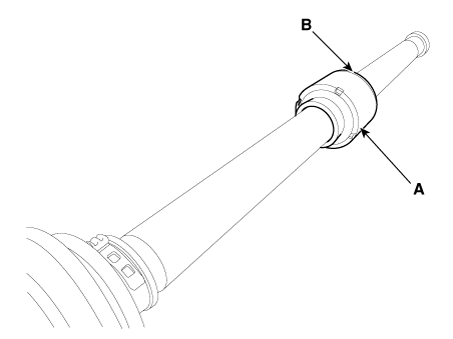
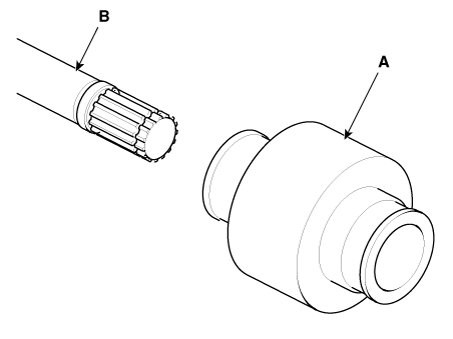
| 3. | Remove the remove the both side of band (B) of the dynamic damper (A).
|
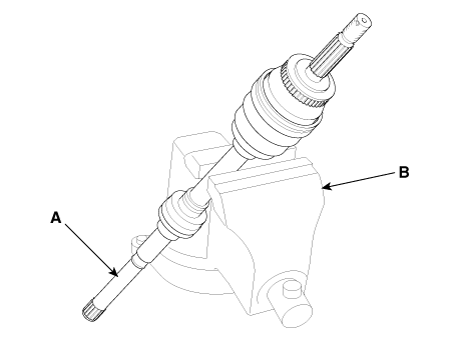
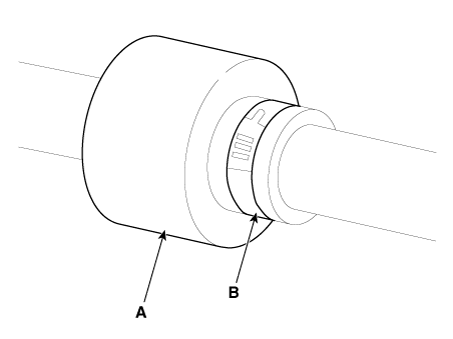
| 4. | Fix the driveshaft (A) with a vice (B) as illustrated.
|
| 5. | Apply
soap powder on the shaft to prevent being damaged between the shaft
spline and the dynamic damper when the dynamic damper is removed. |
| 6. | Seperate the dynamic damper (A) from the shaft (B) carefully.
|
| Installation |
| 1. | Apply soap powder on the shaft to prevent being damaged between the shaft spline and the dynamic damper. |
| 2. | Install the dynamic damper. |
| 3. | Install the dynamic damper band (A). |
| 4. | Using the SST(09495-3K000), secure the TJ boot bands (B).
|
| 5. | Install the TJ joint assembly.
(Refer to Driveshaft Assembly - “TJ Joint”)
|
| 6. | Install the front driveshaft.
(Refer to Driveshaft Assembly - “Front Driveshaft”)
|
| 7. | Check the front alignment.
(Refer to Suspension System - "Alignment")
|
 TJ Joint
Components and components location
Components
[RH]
1. BJ assembly 2. Clip 3. BJ boot band 4. BJ boot 5. Dynamic damper band 6. Dynamic damper 7. Shaft 8. TJ boot band 9. TJ boot 10. Spi ...
 BJ Boot
Components and components location
Components
[RH]
1. BJ assembly 2. Clip 3. BJ boot band 4. BJ boot 5. Dynamic damper band 6. Dynamic damper 7. Shaft 8. TJ boot band 9. TJ boot 10. Spi ...
Other information:
Kia Picanto JA 2017-2025 Owner's Manual: Interior overview
1. Inside door handle 2. Door lock/unlock button 3. Outside rearview mirror folding switch 4. Outside rearview mirror control switch 5. Central door lock switch 6. Power window lock button 7. Power window switches 8. Hood release lever 9. Fuel filler lid release lever 10. Steerin ...
Kia Picanto JA 2017-2025 Service & Repair Manual: Fuel Pump
Repair procedures Inspection [Fuel pump] 1.Turn ignition switch OFF and disconnect the negative (-)battery cable. 2.Remove the fuel pump assembly. 3.Check motor operation by fuel pump connector (A) connecting power(No.2) and ground(No.4) Pin No. ...
Copyright © www.kpicanto.com 2017-2025
