Kia Picanto (JA): Specifications & Consumer information / Refrigerant label, Declaration of conformity, Fuel label

Kia Picanto (JA) 2017-2025 Owner's Manual / Specifications & Consumer information / Refrigerant label, Declaration of conformity, Fuel label

Refrigerant label

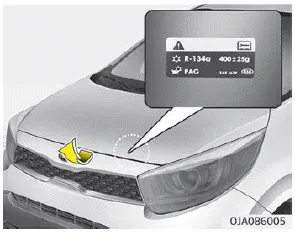
The refrigerant label is located on the underside of the hood.

Declaration of conformity

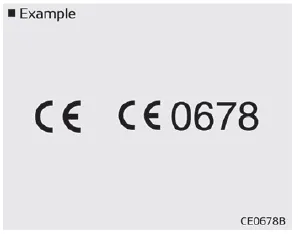
The radio frequency components of the vehicle comply with requirements and other relevant provisions of Directive 1995/5/EC.

Further information including the manufacturer's declaration of conformity is available on Kia web site as follows;

http://www.kia-hotline.com

Fuel label

Gasoline (Petrol) engine

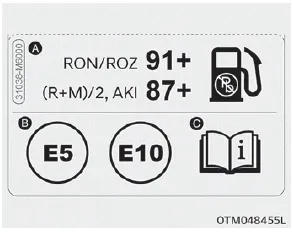
The fuel label is attached on the fuel filler door.

A. Octane rating of unleaded gasoline (petrol)

1. RON/ROZ: Research Octane Number

2. (R+M)/2, AKI: Anti Knock Index

B. Identifiers for Petrol-type fuels

❈ This symbol means usable fuel. Do not use any other fuel.

C. For further details, refer to “Fuel requirements” on page 1-03.

    Tire specification and pressure label The tires supplied on your new vehicle are chosen to provide the best performance for normal driving. The tire label located on the driver's side center pillar gives the tire pressures recommended for your car.

    Discover the definitive resource for maintaining and repairing your Kia Picanto (JA) 2017–2025: the comprehensive Service & Repair Manual. This detailed manual covers all major systems of the vehicle—including powertrain, suspension, brake systems, body work, and electrical circuits—providing the diagrams, step-by-step procedures, and practical tips needed to diagnose and fix issues with confidence.

    Other information:

    Kia Picanto (JA) 2017-2025 Service & Repair Manual: Smart Key Unit

    Components and components location Components Connector Pin Information No. Connector A Connector B Connector C 1 - IGN2 Relay_output Battery (+)_Signal 2 SSB Switch1 signal_input P-CAN (Low) - 3 Driver door o

    Kia Picanto (JA) 2017-2025 Service & Repair Manual: Sunroof Motor

    Repair procedures Inspection 1.Disconnect the negative (-) battery terminal. 2.Remove the roof trim assembly. (Refer to Body - "Roof Trim Assembly") 3.Remove the glass motor (A) after loosening the mounting screws. 4.

    Categories

     
    Copyright © 2025 www.kpicanto.com - 0.0296