Kia Picanto: Crash Pad / Crash Pad Lower Panel
Kia Picanto JA 2017-2025 Service & Repair Manual / Body (Interior and Exterior) / Crash Pad / Crash Pad Lower Panel
Components and components location
| Component Location |

| 1. Crash pad lower panel |
Repair procedures
| Replacement |
Put on gloves to protect your hands. |

|

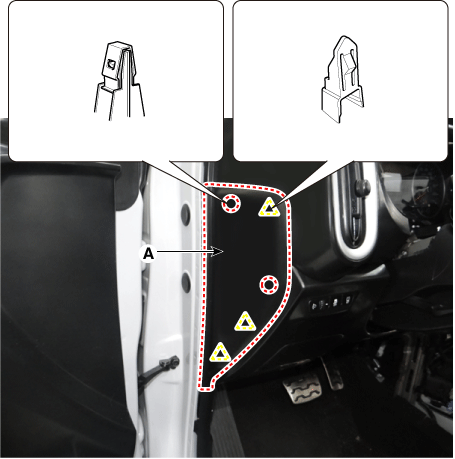
| 1. | Remove the crash pad side cover [LH] (A) by using a remover.
|
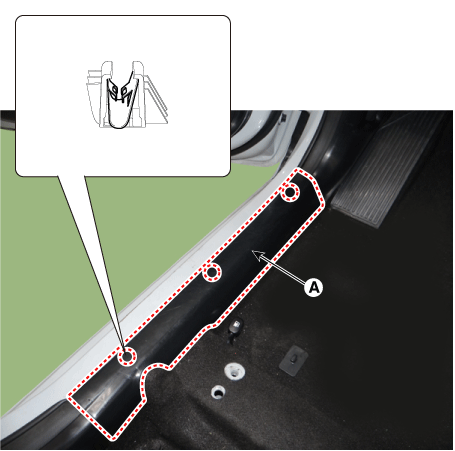
| 2. | Remove the front door scuff trim (A) by using a remover.
|
| 3. | Remove the hood latch release handle (A) by using a remover.
|
| 4. | Remove the cowl side trim (A) by using a remover.
|
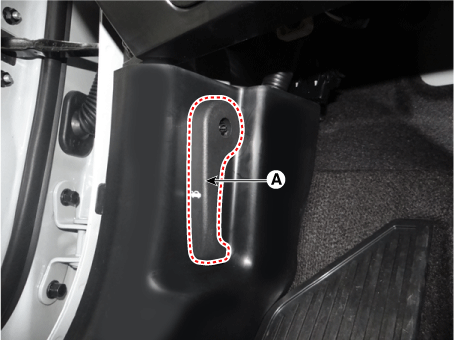
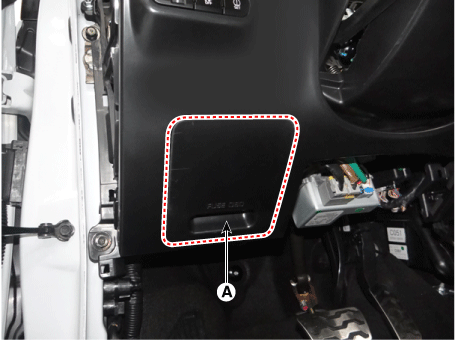
| 5. | Remove the passenger compartment junction box cover (A).
|
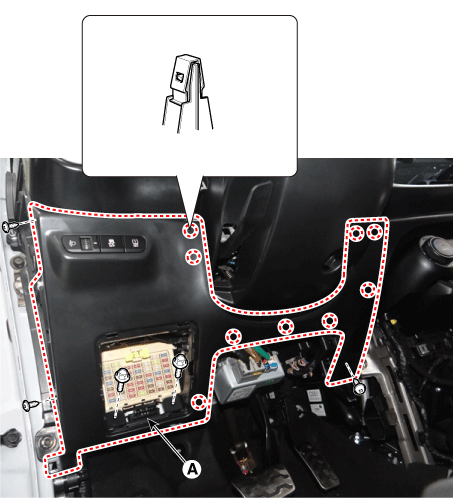
| 6. | Separate the crash pad lower panel (A) after loosening the bolts and screws.
|
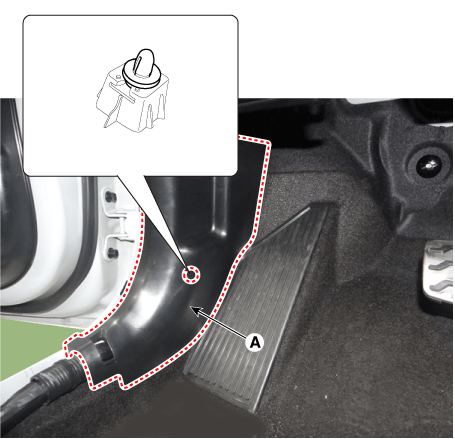
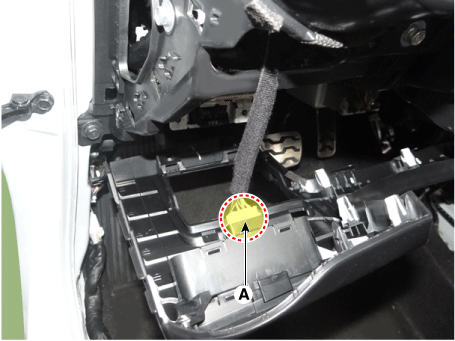
| 7. | Disconnect the crash pad lower side switch connector (A).
|
| 8. | Install in the reverse order of removal.
|
 Center Fascia Panel
Components and components location
Component Location
1. Center fascia panel assembly
Repair procedures
Replacement
Put on gloves to protect your ...
 Glove Box Housing
Components and components location
Component Location
1. Glove box housing assembly
Repair procedures
Replacement
Put on gloves to protect your ha ...
Other information:
Kia Picanto JA 2017-2025 Service & Repair Manual: Front Door Outside Handle
Components and components location Component Location 1. Front door outside handle Repair procedures Replacement Put on gloves to protect your hands. • Use a plastic panel removal tool to re ...
Kia Picanto JA 2017-2025 Owner's Manual: Vehicle Identification Number (VIN), Vehicle certification label
Vehicle Identification Number (VIN) The vehicle identification number (VIN) is the number used in registering your car and in all legal matters pertaining to its ownership, etc. The number is punched on the floor under the right side seat. To check the number, remove the cover. VIN ...
Copyright © www.kpicanto.com 2017-2025
