Kia Picanto: Front Door / Front Door Outside Handle
Kia Picanto JA 2017-2025 Service & Repair Manual / Body (Interior and Exterior) / Front Door / Front Door Outside Handle
Components and components location
| Component Location |
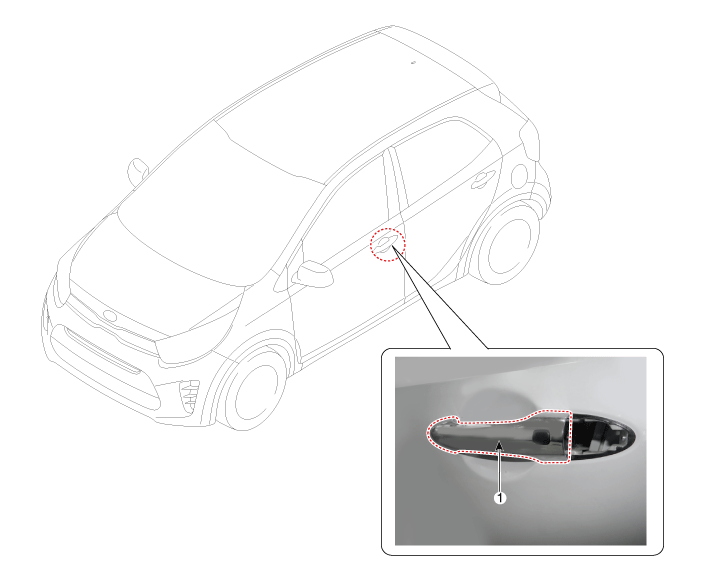
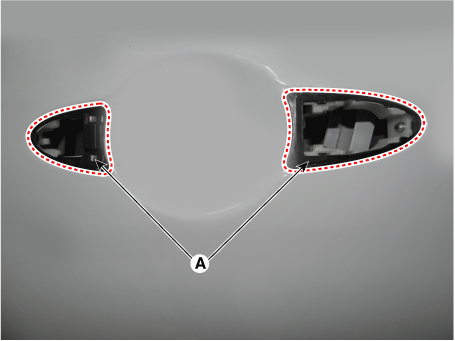
| 1. Front door outside handle |
Repair procedures
| Replacement |
Put on gloves to protect your hands. |

|

| 1. | Remove the front door trim.
(Refer to Front Door - "Front Door Trim")
|
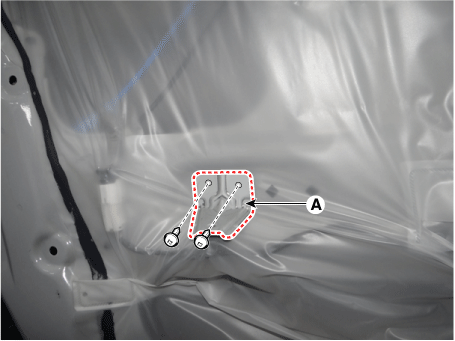
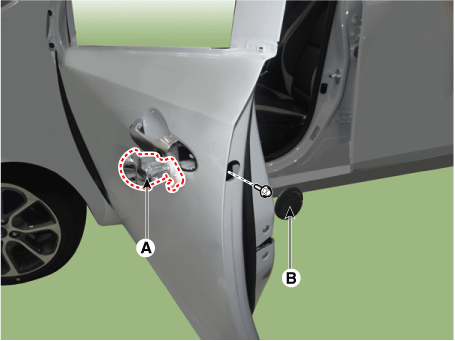
| 2. | Remove the door pull handle mounting support (A) after loosening the screws.
|
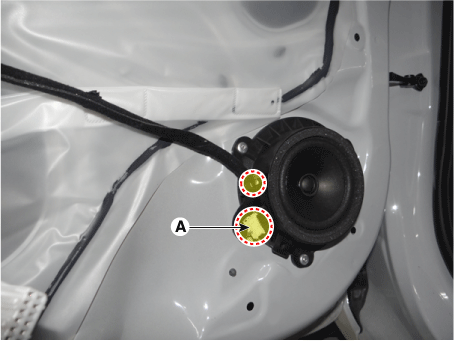
| 3. | Disconnect the front door speaker connector (A), and then remove the wiring mounting clips.
|
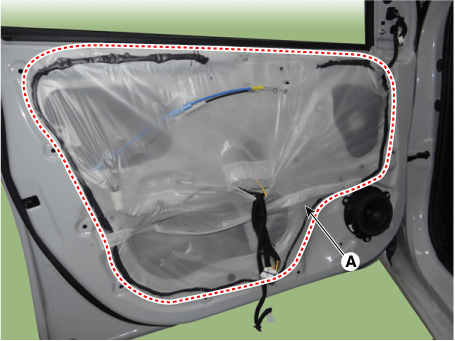
| 4. | Remove the front door trim seal (A).
|
| 5. | Disconnect the door lock rod (A).
|

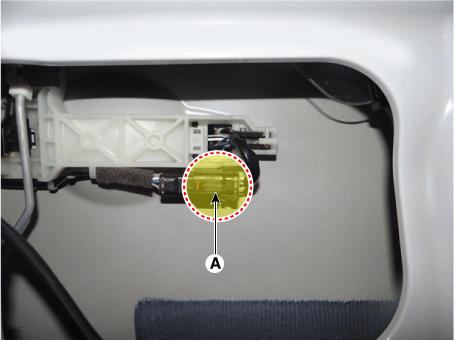
| 6. | Disconnect the front door outside handle connector (A).
|
| 7. | Remove the plug hole cap (B) and then loosen the bolt and remove the door lock assembly (A).
|
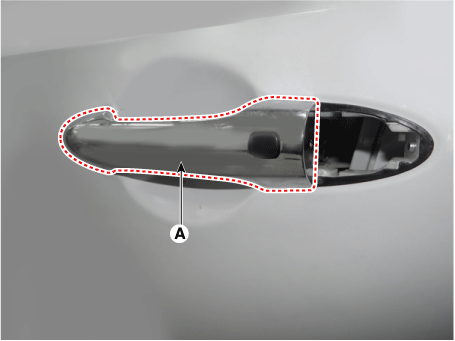
| 8. | Remove the front door outside handle (A) by sliding it rearward.
|
| 9. | Install in the reverse order of removal.
|
 Front Door Power Window Regulator
Components and components location
Component Location
1. Front door window glass
Repair procedures
Replacement
Put on gloves to protect your hand ...
 Front Door Latch
Components and components location
Component Location
1. Front door latch
Repair procedures
Replacement
Put on gloves to protect your hands.
...
Other information:
Kia Picanto JA 2017-2025 Service & Repair Manual: Passenger Airbag (PAB) Module
Description and operation Description The passenger airbag (PAB) is installed inside the crash pad and protects the front passenger in the event of a frontal crash. The SRSCM determines if and when to deploy the PAB. Never attempt to measure the circuit resista ...
Kia Picanto JA 2017-2025 Service & Repair Manual: Seat Belt Buckle Switch (BS)
Description and operation Description The SRSCM shall monitor the status of the driver and front passenger seat belt buckle. The SRSCM provides one pin each for the driver and front passenger seat belt buckle status input. The seat belt buckle circuit operates from internal boost volta ...
Copyright © www.kpicanto.com 2017-2025
