Kia Picanto (JA): Body (Interior and Exterior) / Quarter Fixed Glass
Components and components location
| Component Location |

| 1. Quarter fixed glass |
Repair procedures
| Replacement |
Put on gloves to protect your hands. |

|

| 1. | Remove the front door trim.
(Refer to Front Door - "Front Door Trim")
|
| 2. | Separate the rear door inside handle (A) after loosening the mounting screw.
|

| 3. | Remove the front door inside handle (B) after disconnecting the cable (A).
|
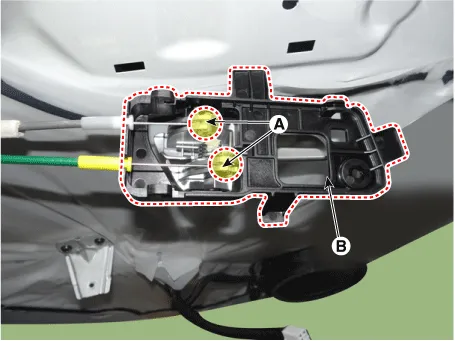
| 4. | Remove the door pull handle mounting support (A) after loosening the screws.
|

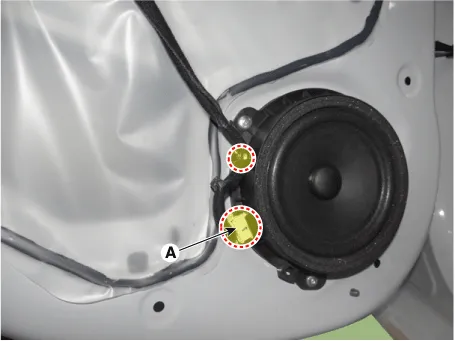
| 5. | Disconnect the front door speaker connector (A), and then remove the wiring mounting clips.
|
| 6. | Remove the front door trim seal (A).
|

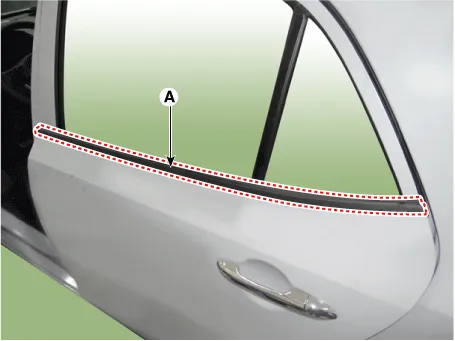
| 7. | Remove the front door belt inside weather strip (A).
|

| 8. | Remove the front door belt outside weather strip (A).
|
| 9. | Separate the door side weatherstrip (A).
|

| 10. | Remove the quarter fixed glass & molding (A) after loosening the mounting screw and bolts.
|

| 11. | Remove the quarter fixed glass (A) from the molding.
|

| 12. | Install in the reverse order of removal.
|
Repair procedures Replacement 1.Remove the sunroof assembly. (Refer to Sunroof - "Sunroof Assembly") 2.Remove the sunroof sunshade.
Components and components location Components 11. Rear bumper cover assembly 2. Rear bumper beam 3. Rear bumper side mounting bracket [LH]
Other information:
Kia Picanto (JA) 2017-2026 Service & Repair Manual: Front Fog Lamps
Repair procedures Removal 1.Disconnect the negative (-) battery terminal. 2.Remove the front bumper assembly. (Refer to Body - "Front Bumper Assembly") 3.Remove the front fog lamp assembly (A) after loosening the mounting screws.
Kia Picanto (JA) 2017-2026 Service & Repair Manual: Windshield Wiper-Washer Switch
Repair procedures Removal 1.Disconnect the negative (-) battery terminal. 2.Remove the steering column upper and lower shrouds after loosening the screws. (Refer to Body - "Steering Column Shroud Panal") 3.Disconnect the wiper switch / washer switch connector (A).
Categories
- Manuals Home
- Kia Picanto Owners Manual
- Kia Picanto Service Manual
- Clutch Cable
- Cooling System
- Timing Chain
- New on site
- Most important about car
