Kia Picanto (JA): Fuel Delivery System / Fuel Line
Repair procedures
| Removal |
| 1. | Release the residual pressure in fuel line.
(Reter to Fuel Delivery System - "Release Residual Pressure in Fuel Line")
|
| 2. | Turn the ignition switch OFF, and then remove the battery negative (-) terminal. |
| 3. | Remove the air cleaner.
(Refer to Engine Mechanical System - "Air Cleaner")
|
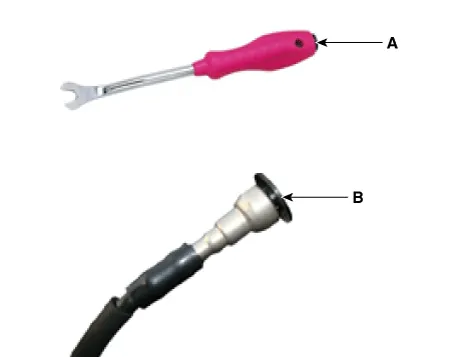
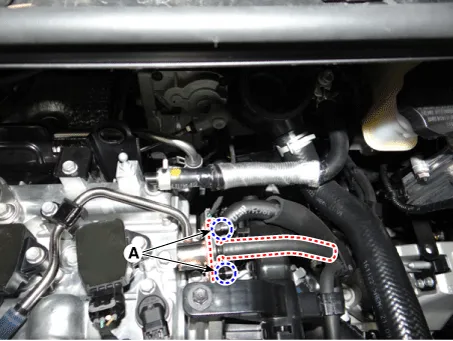
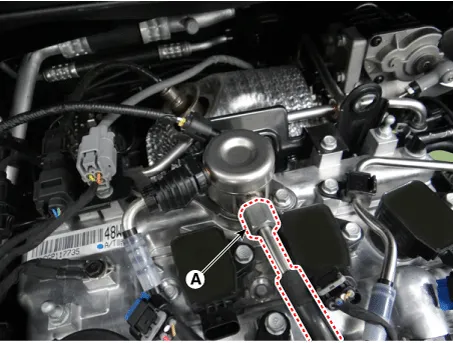
| 4. | Disconnect the fuel feed tube quick-connector (A).
|

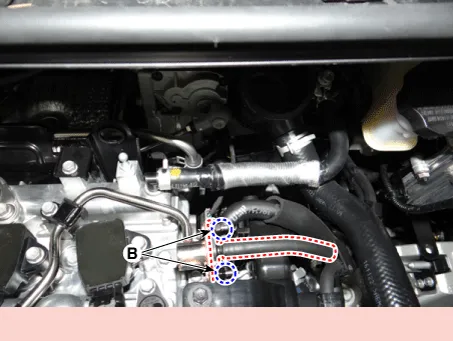
| 5. | Remove the low pressure fuel line mounting bolt (A) and nut (B).
|
| 1. | Release the residual pressure in fuel line.
(Reter to Fuel Delivery System - "Release Residual Pressure in Fuel Line")
|
| 2. | Turn the ignition switch OFF, and then remove the battery negative (-) terminal. |
| 3. | Remove the air cleaner.
(Refer to Engine Mechanical System - "Air Cleaner")
|
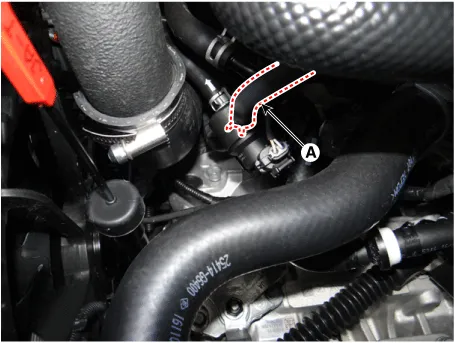
| 4. | Disconnect the fuel feed tube (A).
|
| 5. | Disconnect the vapor hose (A) from the purge control solenoid valve.
|
| 6. | Remove the catalytic converter & center muffler assembly.
(Refer to Engine Mechanical System - "Muffler")
|
| 7. | Remove the fuel tank.
(Refer to Fuel Delivery System - "Fuel Tank")
|
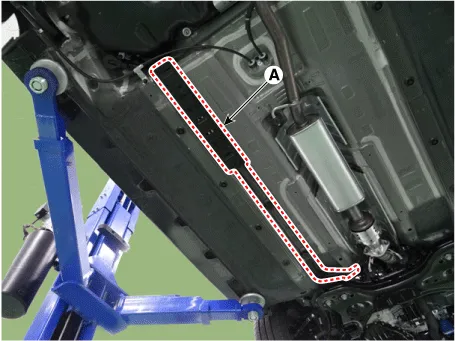
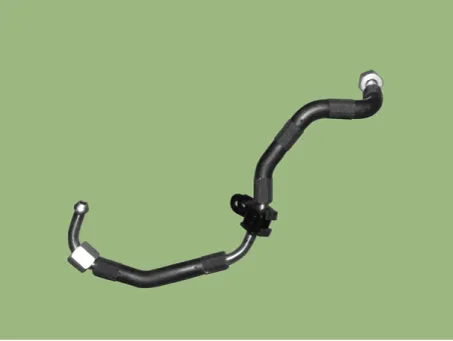
| 8. | Remove the fuel line (A) after loosening the mounting bolts and bracket.
|
| 1. | Release the residual pressure in fuel line.
(Reter to Fuel Delivery System - "Release Residual Pressure in Fuel Line")
|
| 2. | Turn the ignition switch OFF, and then remove the battery negative (-) terminal. |
| 3. | Remove the air cleaner.
(Refer to Engine Mechanical System - "Air Cleaner")
|
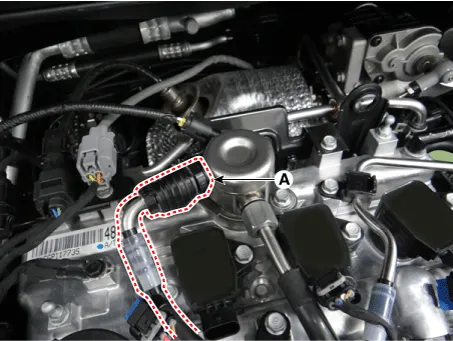
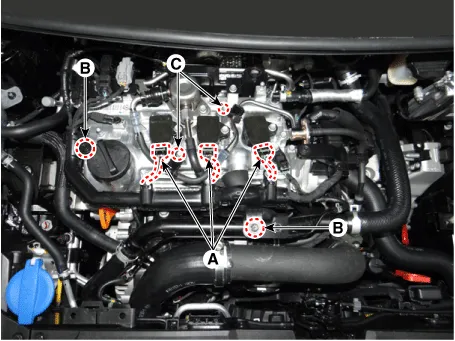
| 4. | Disconnect the ignition coil connector (A). |
| 5. | Remove the engine control wiring mounting bolts (B). |
| 6. | Remove the low pressure fuel line mounting bolts (C).
|
| 7. | Remove the purge control solenoid valve (PCSV).
(Refer to Engine control System - "Purge Control Solenoid Valve (PCSV)")
|
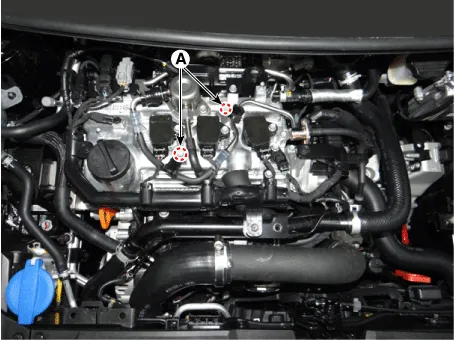
| 8. | Remove the high pressure fuel pipe.
|

| Installation |
| 1. | Install the fuel line in the reverse order of removal. |
| 2. | Install the high-pressure fuel pipe as follows.
|

Repair procedures Removal 1.Remove the fuel pump. (Refer to Fuel Delivery System - "Fuel Pump") 2.Disconnect the fuel pump motor connector (A) and fuel sender connector (B).
Repair procedures Removal 1. Open the fuel filler door and then remove the filler-neck mounting bolts (A). Filler-neck assembly mounting bolt: 7.
Other information:
Kia Picanto (JA) 2017-2026 Service & Repair Manual: Smart Key System
Specifications Specifications Smart Key Unit Items Specification Rated voltage DC 12 V Operating voltage DC 9 - 16 V Operating temperature -31 - 167°F (-35 - 75°C) Load Max. 4mA (When welcome light function "OFF") RF Receiver Items
Kia Picanto (JA) 2017-2026 Service & Repair Manual: Windshield Wiper/Washer
Components and components location Component Location 1. Windshield wiper arm & blade 2. Wiper & washer switch 3. Windshield washer hose & nozzle 4. Wiper motor & linkage assembly 5. Washer motor 6. Washer reservoir tank 7. Wiper/Washer relay 8.
Categories
- Manuals Home
- Kia Picanto Owners Manual
- Kia Picanto Service Manual
- Brake System
- Body Electrical System
- Fuel Delivery System
- New on site
- Most important about car
