Kia Picanto: Engine And Transaxle Assembly / Engine Mounting
Components and components location
| Components |
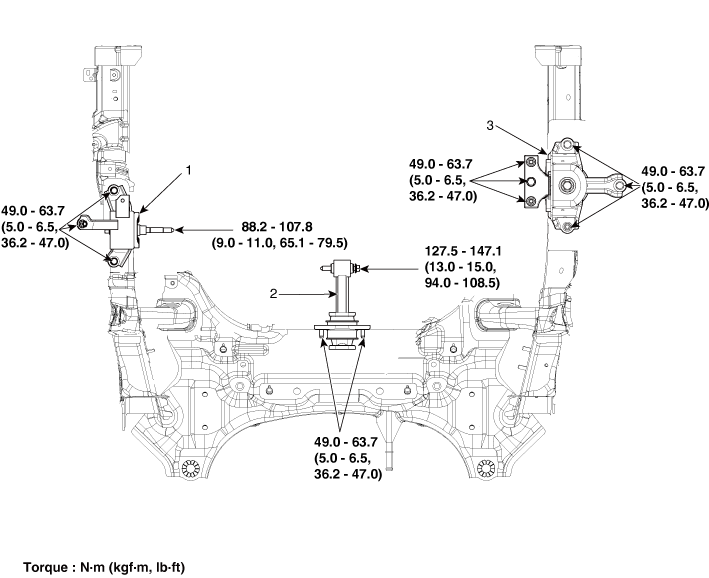
| 1. Engine mounting bracket 2. Roll rod bracket | 3. Transaxle mounting bracket |
Repair procedures
| Removal and Installation |
Engine Mounting Bracket
| 1. | Remove the engine room under cover and RH side cover.
(Refer to Engine and Transaxle Assembly - Engine Room Under Cover")
|
| 2. | Remove the reservoir tank.
(Refer to Cooling System - "Reservoir Tank")
|
| 3. | Install the jack to the edge of upper oil pan to support the engine.
|

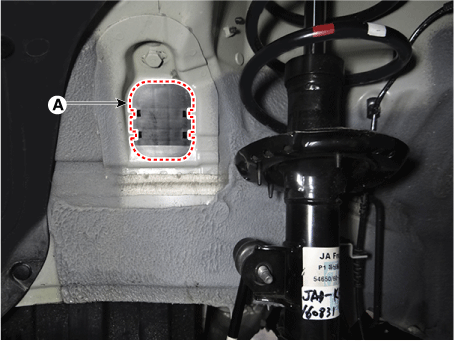
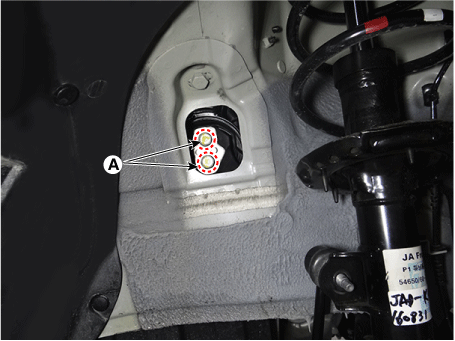
| 4. | Remove the engine mounting bracket (A).
|

| 5. | Install in the reverse order of removal. |
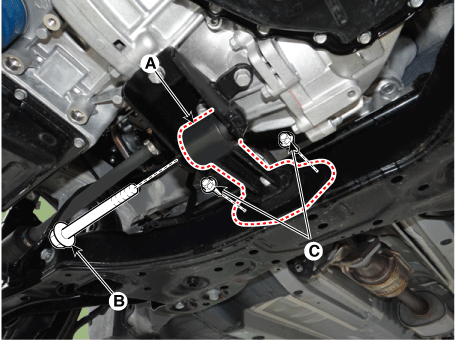
Roll Rod Bracket
| 1. | Remove the engine room under cover.
(Refer to Engine and Transaxle Assembly - "Engine Room Under Cover")
|
| 2. | Remove the intercooler inlet hoses & pipe (A).
|

| 3. | Remove the roll rod bracket (A).
|
| 4. | Install in the reverse order of removal. |
Transaxle Mounting Bracket
| 1. | Remove the battery and tray.
(Refer to Engine Electrical System - "Battery")
|
| 2. | Remove the engine room under cover and LH side cover.
(Refer to Engine and Transaxle Assembly - Engine Room Under Cover")
|
| 3. | Install the jack to the edge of transaxle. |
| 4. | Remove the transaxle side panel packing (A).
|
| 5. | Remove the transaxle mounting bolts (A).
|
| 6. | Remove the transaxle mounting bracket (A).
|

| 7. | Install in the reverse order of removal. |
 Engine Room Under Cover
Repair procedures
Removal and Installation
Engine Room Under Cover
1. Remove the engine room under cover (A).
Tightening torque :
7.8 - 11.8 N·m (0.8 - 1.2 kgf·m, ...
 Engine And Transaxle Assembly
Repair procedures
Removal
•
Use fender covers to avoid damaging painted surfaces. •
To avoid damage, unplug th ...
Other information:
Kia Picanto JA 2017-2025 Owner's Manual: Increase cargo space
If you want to increase cargo space, 1. Grasp the handle on the top of the cover and lift it 2. Fold the rear part of the luggage board frontward 3. Pull the luggage board hinge to the end of sliding slot and it will fall down lower to increase cargo space. 4. Slide it frontward (r ...
Kia Picanto JA 2017-2025 Owner's Manual: Normal Maintenance Schedule - For Gasoline Engine [For Europe (Except Russia)]
The following maintenance services must be performed to ensure good emission control and performance. Keep receipts for all vehicle emission services to protect your warranty. Where both mileage and time are shown, the frequency of service is determined by whichever occurs first. I: ...
Copyright © www.kpicanto.com 2017-2025
