Kia Picanto: Power Train / Spark Plug
Repair procedures
| Inspection |
| [On vehicle inspection] |
| 1. | Accelerate the engine to about 3,000 rpm 3 times or more. |
| 2. | Remove the spark plug. |
| 3. | Check the spark plug visually. If the electrode is dry, the spark plug is normal. If the electrode is wet, check the damage and electrode gap as below. |
| [Component Inspection] |
| 1. | Check the spark plug for any damage on its thread and insulator. If there is damage, replace the spark plug. |
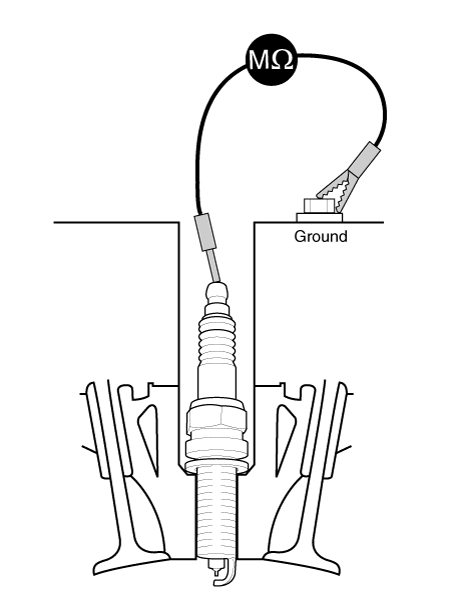
| 2. | Check the electrode. Measure the insulation resistance with an ohmmeter. If the resistance is less than the specified value, adjust the electrode gap.
|
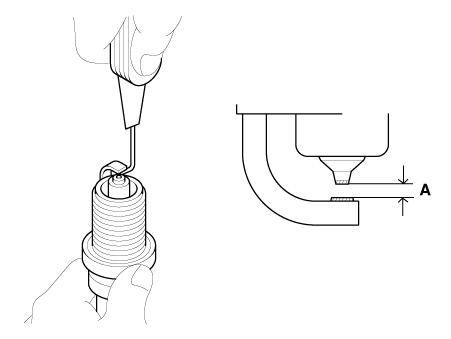
| 3. | Check the spark plug electrode gap. If the gap is greater than the maximum, replace the spark plug.
|

| Replacement |
Kappa 1.0 MPI
| 1. | Remove the ignition coil. (Refer to Engine Electrical System - "Ignition Coil") |
| 2. | Using a spark plug wrench, remove the spark plug (A).
|
| 3. | Install in the reverse order of removal. |
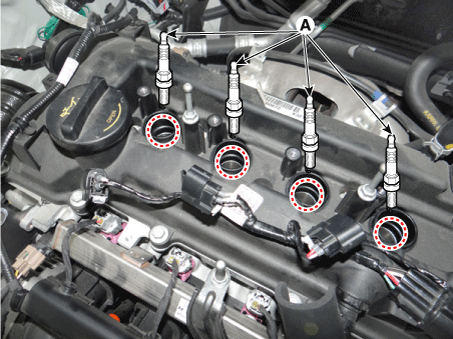
Kappa 1.2 MPI
| 1. | Remove the ignition coil. (Refer to Engine Electrical System - "Ignition Coil") |
| 2. | Using a spark plug wrench, remove the spark plug (A).
|
| 3. | Install in the reverse order of removal. |
 Manual Transaxle Oil
Repair procedures
Inspection
Manual Transaxle Oil Level Check
1. Stop the engine and then raise the vehicle using the lift.
2. Remove the oil filler plug (A). [Kappa 1.0 MPI / FFV, Kappa 1.2 ...
 Valve Clearance
Repair procedures
Inspection
[Kappa 1.0 MPI, 1.0 FFV, 1.0 T-GDI]
Check the valve clearance. If necessary, adjust the valve clearance by replacing the tappets. ...
Other information:
Kia Picanto JA 2017-2025 Owner's Manual: Engine Exhaust can be dangerous
WARNING ENGINE EXHAUST CAN BE DANGEROUS! Engine exhaust fumes can be extremely dangerous. If, at any time, you smell exhaust fumes inside the vehicle, open the windows immediately. Do not inhale exhaust fumes. Exhaust fumes contain carbon monoxide, a colorless, odorless gas th ...
Kia Picanto JA 2017-2025 Service & Repair Manual: Outside Rear View Mirror
Components and components location Component Location 1. Outside rear view mirror Repair procedures Replacement Put on gloves to protect your hands. • Use a plastic panel removal tool to remove ...
Copyright © www.kpicanto.com 2017-2025
