Kia Picanto (JA): Hood / Hood Assembly
Components and components location
| Component Location |
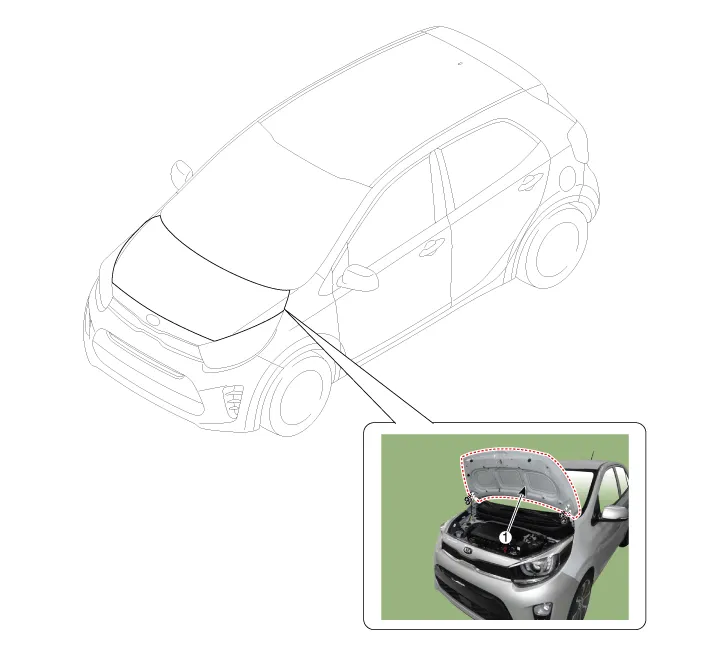
| 1. Hood assembly |
Repair procedures
| Replacement |
Be careful not to damage the hood and body. |

|

| 1. | Remove the hood assembly (A) after loosening the hood hinge mounting bolts.
|

| 2. | Install in the reverse order of removal.
|
Repair procedures Adjustment 1. After loosening the hinge (A) mounting bolts, adjust the hood (B) by moving it up and down, or right and left. 2.
Repair procedures Replacement 1. Remove the hood weatherstrip (A). Be careful not to damage the hood and body. 2. Install in the reverse order of removal.
Other information:
Kia Picanto (JA) 2017-2026 Service & Repair Manual: Headlamp Leveling Switch
Schematic diagrams Circuit Diagram Repair procedures Removal 1.Disconnect the negative (-) battery terminal. 2.Remove the crash pad lower panel. (Refer to Body - "Crash Pad Lower Panel") 3.Remove the crash pad side switch (A) after loosening the mounting screws.
Kia Picanto (JA) 2017-2026 Service & Repair Manual: Heating,Ventilation, Air Conditioning
Specifications Specification Air conditioner Item Specification Compressor Type 5VSe09(Variable Dispacement Swashplate) 5VS09 Oil type & Capacity FD46XG(PAG) 100±10g Pulley type POLY V RIBBED BEIT 6PK Displacement 90cc/rev Condenser Heat rejection 9,890 -3% kcal/h
Categories
- Manuals Home
- Kia Picanto Owners Manual
- Kia Picanto Service Manual
- Cooling System
- Battery
- Brake System
- New on site
- Most important about car
