Kia Picanto (JA): Rear Suspension System / Rear Shock Absorber
Components and components location
| Components |

| 1. Cover 2. Lock nut 3. Retainer 4. Upper bushing | 5. Collar 6. Lower bushing 7. Upper cover 8. Bumper stopper | 9. Dust cover 10. Shock absorber assembly 11. Washer 12. Bolt |
Repair procedures
| Replacement |
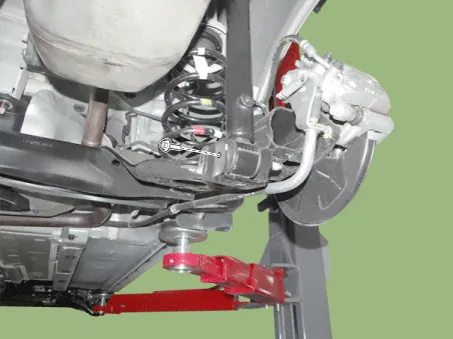
| 1. | Remove the wheel tire (A).
|


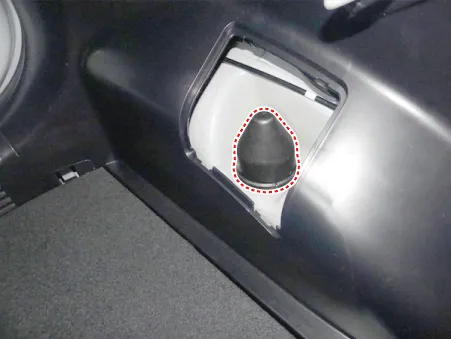
| 2. | Remove the rear shock absorber cover.
|
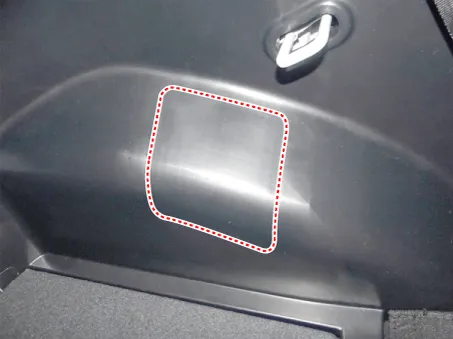
| 3. | Remove the rear shock absorber cover.
|
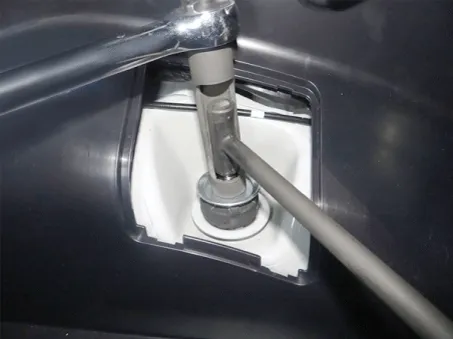
| 4. | Remove the rear shock absorber nut by using the special tool (09546-3X100)
|
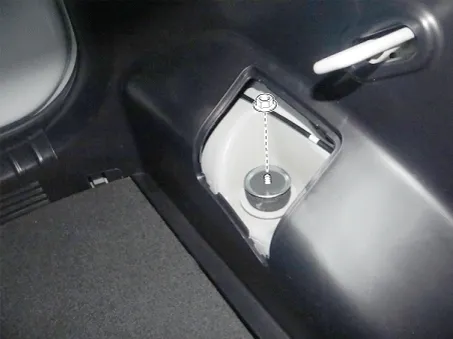
| 5. | Loosen the bolt and then remove the rear shock absorber.
|

| 6. | Install in the reverse order of removal. |
| Inspection |
| 1. | Check the rubber parts for wear and deterioration. |
| 2. | Compress and extend the piston rod (A) and check that there is no abnormal resistance or unusual sound during operation.
|
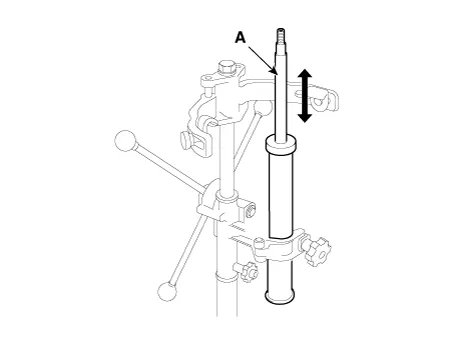
| 1. | Fully extend the piston rod. |
| 2. | Drill a hole on the (A) section to remove gas from the cylinder.
|
Components and components location Components [Disc type] 1. Torsion beam 2. Brake disc 3. Brake caliper [Drum type] 1. Torsion beam axle 2.
Repair procedures Replacement 1. Remove the wheel tire (A). Tightening torque: 107.9 - 127.5 N·m (11.0 - 13.0 kgf·m, 79.
Other information:
Kia Picanto (JA) 2017-2026 Service & Repair Manual: Emergency Call (eCall) Unit
Components and components location Component The eCall unit for AVN is equipped in AVN head unit. Repair procedures Removal Carry out the Test Mode in the following cases.– Replacing the eCall unit– Replacing the Bac
Kia Picanto (JA) 2017-2026 Service & Repair Manual: Power Door Mirror Switch
Components and components location Component Schematic diagrams Circuit Diagram [Folding Mirror Type] [Non-Folding Mirror Type] Repair procedures Inspection 1.Check for continuity between the terminals in each switch position according to the table.
Categories
- Manuals Home
- Kia Picanto Owners Manual
- Kia Picanto Service Manual
- Engine Oil and Filter
- Key positions
- Fuel Delivery System
- New on site
- Most important about car
