
Kia Picanto (JA): Headlamp Leveling System / Headlamp Leveling Actuator
Components and components location
| Components |
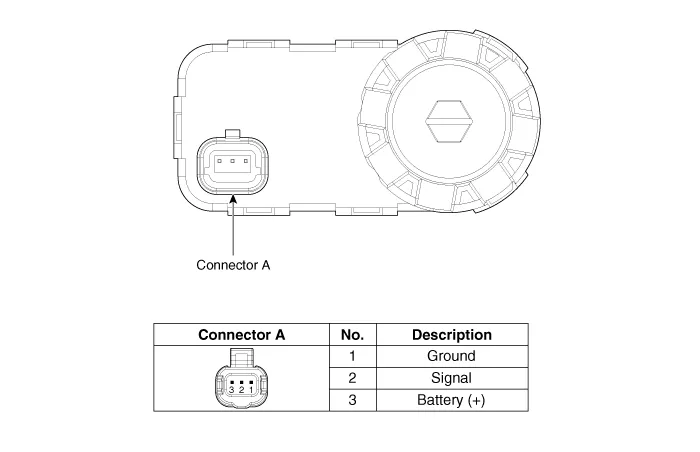
Repair procedures
| Removal |
| 1. | Disconnect the negative (-) battery terminal. |
| 2. | Remove the headlamp assembly.
(Refer to Lighting System - "Headlamps")
|
| Installation |
| 1. | Install the headlamp assembly. |
| 2. | Connect the negative (-) battery terminal. |
| 3. | Adjust the headlamp in accordance with the headlamp aiming instructions. |
Components and components location Component Location 1. Headlamp leveling actuator 2. Headlamp leveling switch ※ headlamp leveling actuator is built into the headlamp.
Schematic diagrams Circuit Diagram Repair procedures Removal 1.Disconnect the negative (-) battery terminal. 2.Remove the crash pad lower panel.
Other information:
Kia Picanto (JA) 2017-2026 Service & Repair Manual: Emergency Call (eCall) Button
Components and components location Component Repair procedures Removal 1. Disconnect the negative (-) battery terminal. 2. Using a screwdriver or remover, separate the map lamp lens (A) from the map lamp. 3. Remove the map lamp (A) after loosening the screws.
Kia Picanto (JA) 2017-2026 Service & Repair Manual: Hazard Lamp Switch
Repair procedures Inspection 1.Check for continuity between terminals. If the continuity is not as specified, replace the hazard lamp switch. No. Description No.
Categories
- Manuals Home
- Kia Picanto Owners Manual
- Kia Picanto Service Manual
- Engine Oil and Filter
- Fuel Delivery System
- Body Control Module (BCM)
- New on site
- Most important about car
