Kia Picanto (JA): Sunroof / Sunroof Assembly
Components and components location
| Components |
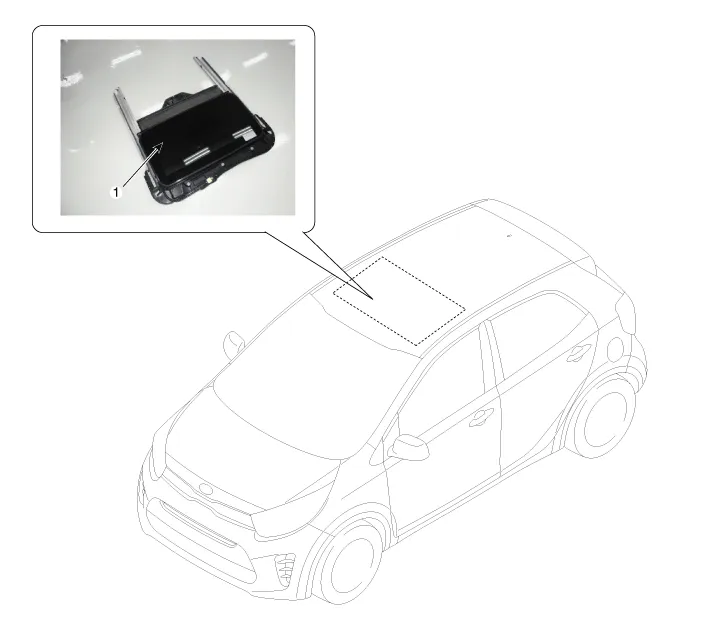
| 1. Sunroof assembly |
Repair procedures
| Replacement |
|

| 1. | Remove the roof trim.
(Refer to Roof Trim - "Roof Trim Assembly")
|
| 2. | Remove the sunroof glass.
(Refer to Sunroof - "Sunroof Glass")
|
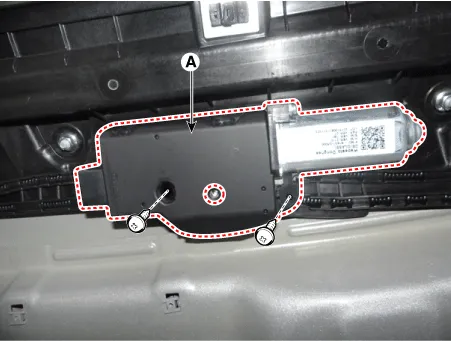
| 3. | Loosen the mounting screws and remove the sunroof motor (A).
|
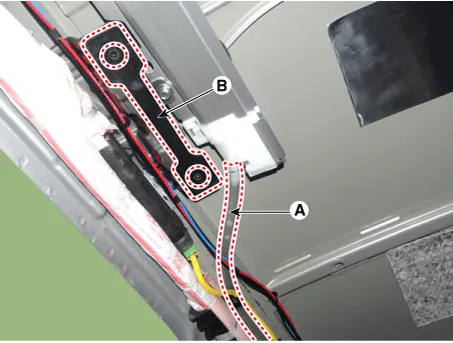
| 4. | Remove the drain hose (A) and assist handle guide plate (B).
|
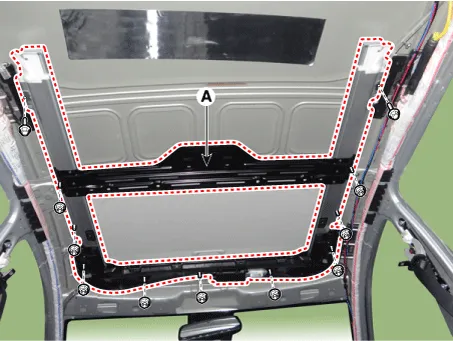
| 5. | Remove the sunroof assembly (A) after loosening the nuts and bolts.
|
| 6. | Install in the reverse order of removal.
|
Repair procedures Replacement 1. Open the glass fully. 2. Remove the mounting pins (B), and then remove the deflector (A). 3. Install in the reverse order of removal.
Repair procedures Replacement 1.Remove the sunroof assembly. (Refer to Sunroof - "Sunroof Assembly") 2.Remove the drip rail assembly (A) after loosening the mounting screws.
Other information:
Kia Picanto (JA) 2017-2026 Service & Repair Manual: Keyless Entry And Burglar Alarm
Specifications Specification Item Specification Power source 3 V Operating temperature -22 - 167°F (-30 - 75°C) RF Modulation FSK LF Modulation ASK RF frequency 433.92 MHz Button number 3 Function Door lock Door unlock Tailgate unlock Components and components locat
Kia Picanto (JA) 2017-2026 Service & Repair Manual: Turn Signal Lamp
Repair procedures Removal Door Mirror Turn Signal Lamp 1. Disconnect the negative (-) battery terminal. 2. Remove the mirror (A) from the mirror holder. Be careful not to damage the fixing clips (A). 3. Disconnect the heating connectors (A) from the mirror.
Categories
- Manuals Home
- Kia Picanto Owners Manual
- Kia Picanto Service Manual
- Fuel Delivery System
- Engine Mechanical System
- Coolant
- New on site
- Most important about car
