Kia Picanto: Crash Pad / Main Crash Pad Assembly
Kia Picanto JA 2017-2024 Service & Repair Manual / Body (Interior and Exterior) / Crash Pad / Main Crash Pad Assembly
Components and components location
| Component Location |
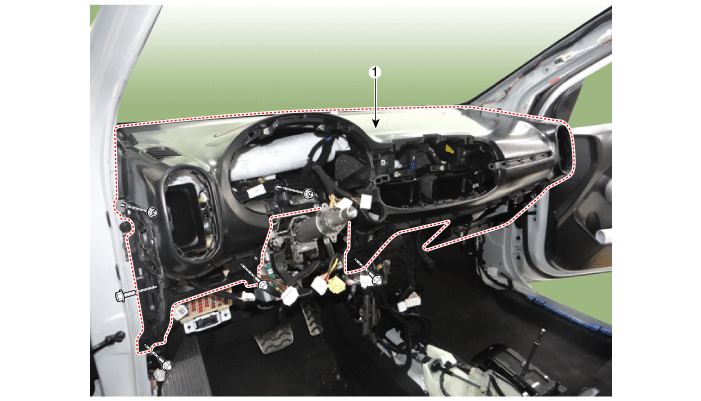
| 1. Crash pad center lower panel |
Repair procedures
| Replacement |
Put on gloves to protect your hands. |

|

| 1. | Disconnect the negative (-) battery terminal. |
| 2. | Remove the front seat assembly.
(Refer to Front Seat - "Front Seat Assembly")
|
| 3. | Remove the floor console assembly.
(Refer to Floor Console - "Floor Console Assembly")
|
| 4. | Remove the steering wheel.
(Refer to Steering System - "Steering Wheel")
|
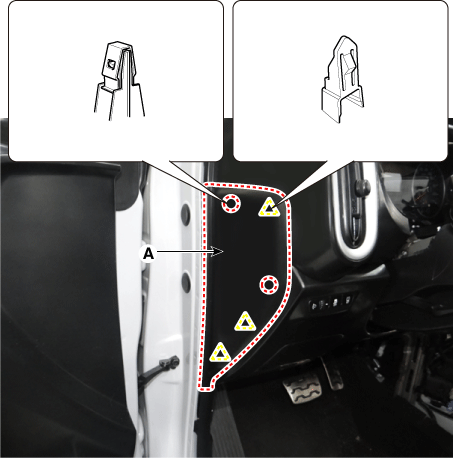
| 5. | Remove the crash pad side cover [LH] (A) by using a remover.
|
| 6. | Remove the hood latch release handle (A) by using a remover.
|
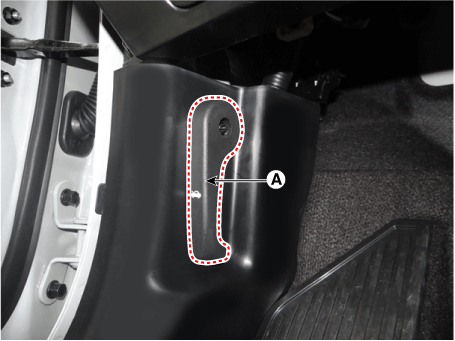
| 7. | Remove the front door scuff trim (A) by using a remover.
|
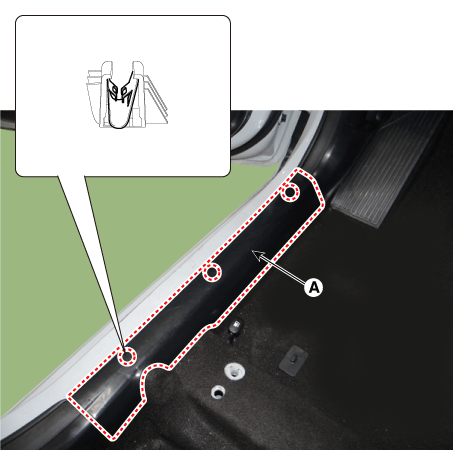
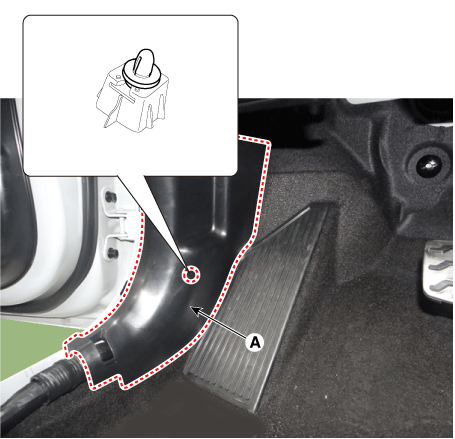
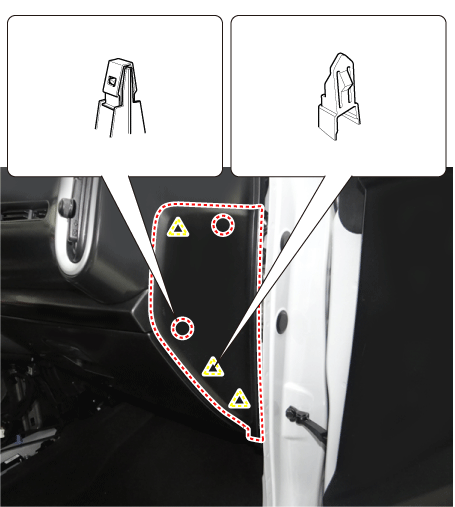
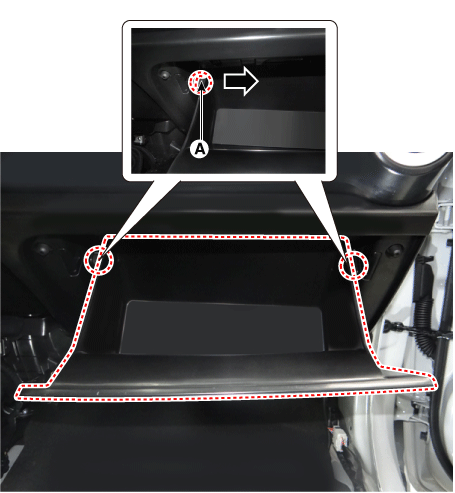
| 8. | Remove the cowl side trim (A) by using a remover.
|
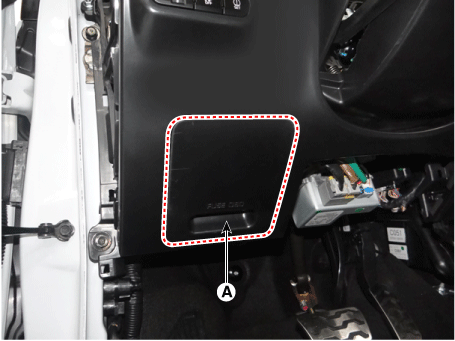
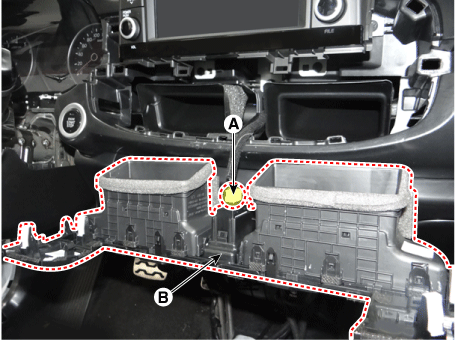
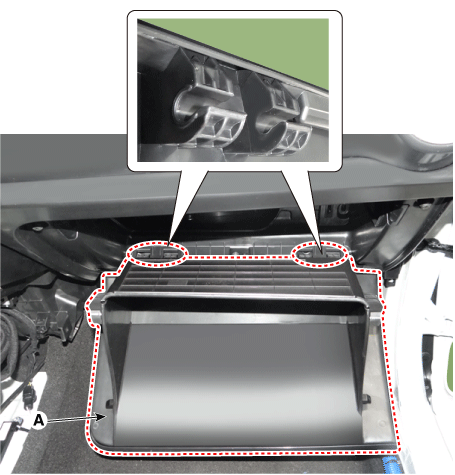
| 9. | Remove the passenger compartment junction box cover (A).
|
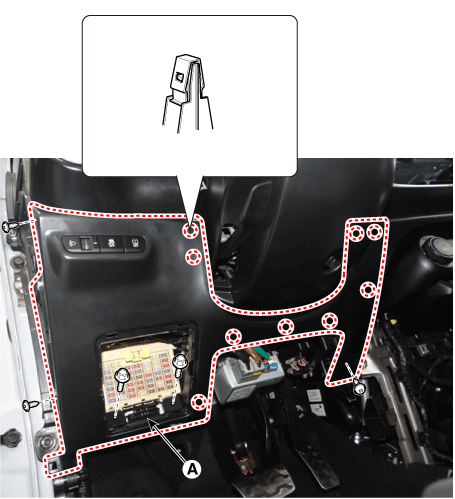
| 10. | Separate the crash pad lower panel (A) after loosening the bolts and screws.
|
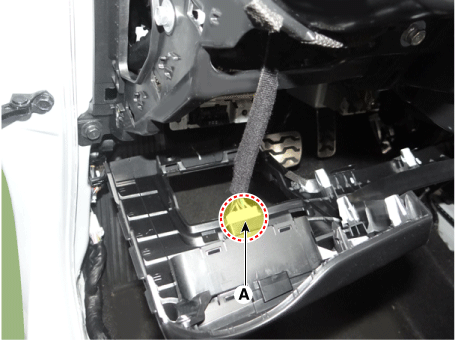
| 11. | Disconnect the crash pad lower side switch connector (A).
|
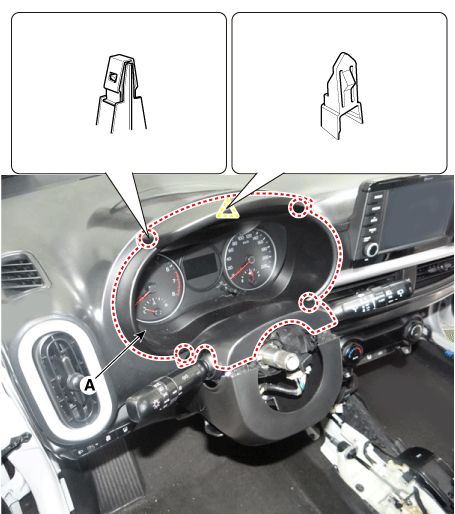
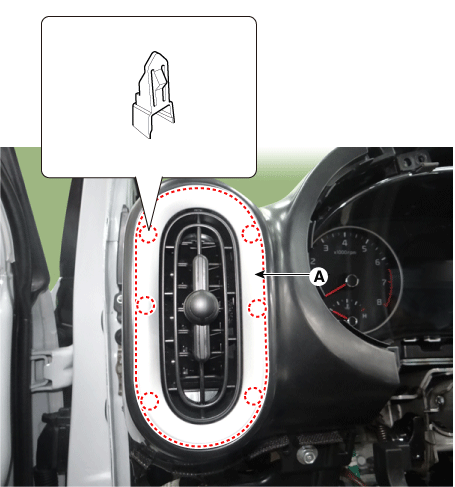
| 12. | Remove the cluster fascia panel (A) by using a remover.
|
| 13. | Remove the center fascia garnish (A) by using a remover.
|

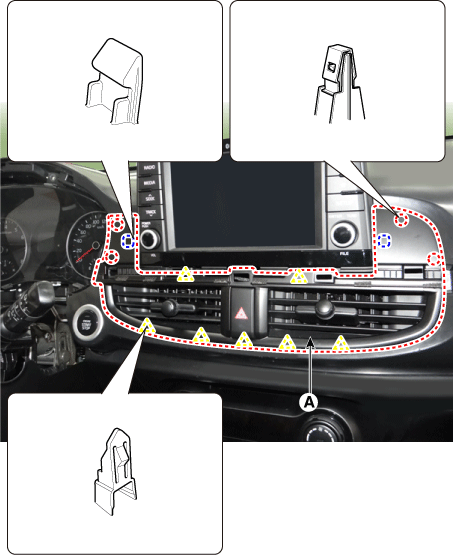
| 14. | Remove the center fascia panel (A) by using a remover.
|
| 15. | Remove the center fascia panel (B) after disconnecting the hazard switch connector (A).
|
| 16. | Remove the crash pad side cover [RH] (A) by using a remover.
|
| 17. | Remove the glove box stopper (A) from the crash pad.
|
| 18. | Remove the glove box (A).
|
| 19. | Remove the crash pad center lower panel (A) after loosening the screws.
|
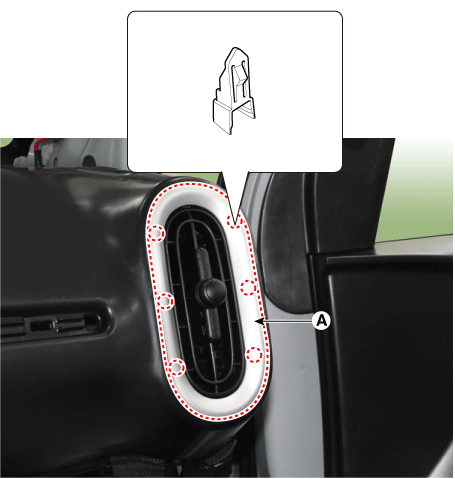
| 20. | Remove the side air vant duct (A) by using a remover.
[LH]
[RH]
|
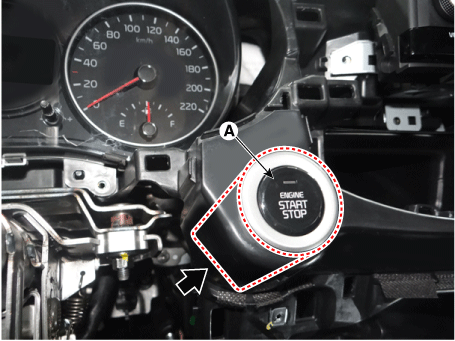
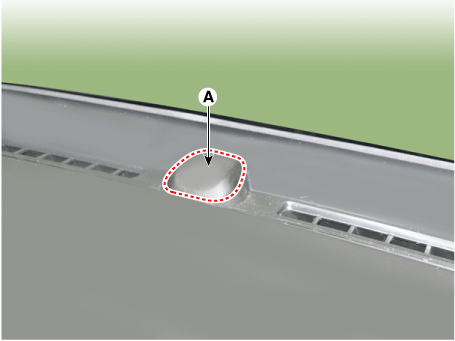
| 21. | Remove the start/stop button (A) in the direction of arrow.
|
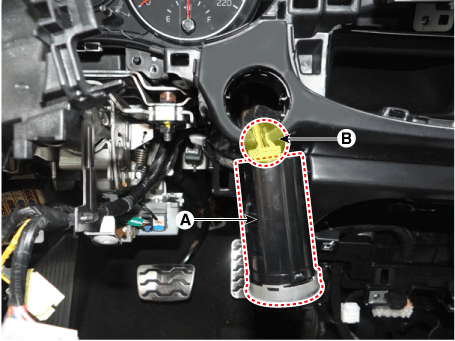
| 22. | Remove the start/stop button (B) after disconnecting the start/stop button connector (A).
|
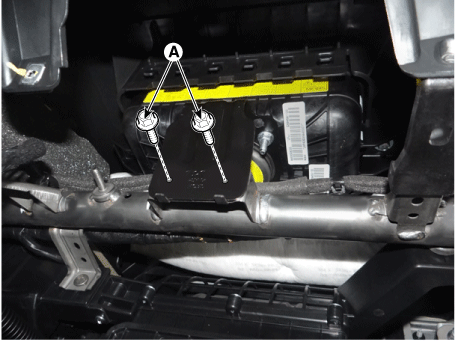
| 23. | Loosen the passenger airbag mounting bolts (A).
|
| 24. | Disconnect the passenger air bag connector (A).
|
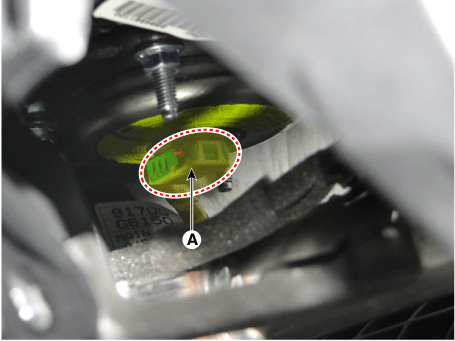
| 25. | Separate the photo sensor (A) by using a remover.
|
| 26. | Remove the photo sensor (A), after disconnecting the photo sensor connector.
|

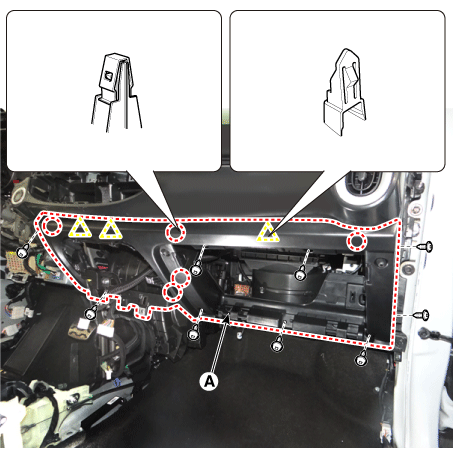
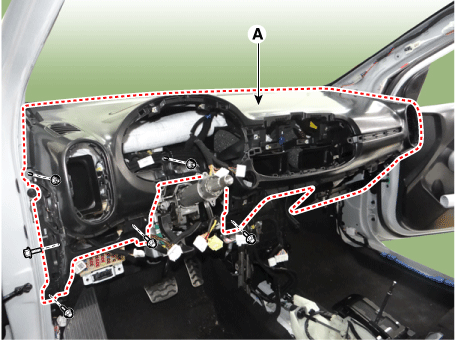
| 27. | Remove the main crash pad assembly (A), after loosening the mounting bolts and nuts.
[LH]
[RH]
|

| 28. | Remove the passenger airbag (A) after loosening the bolts.
|

| 29. | Install in the reverse order of removal.
|
 Crach Pad Center Panel
Components and components location
Component Location
1. Crash pad center lower panel
Repair procedures
Replacement
Put on gloves to protect your ...
 Cowl Cross Bar Assembly
Components and components location
Component Location
1. Crash pad center lower panel
Repair procedures
Replacement
Put on gloves to protect your ...
Other information:
Kia Picanto JA 2017-2024 Service & Repair Manual: Seat Belt Pretensioner (BPT)
Description and operation Description The Seat Belt Pretensioners (BPT) are installed inside Center Pillar (LH & RH). When a vehicle crashes with a certain degree of frontal impact, the pretensioner seat belt helps to reduce the severity of injury to the front seat occupants by ret ...
Kia Picanto JA 2017-2024 Service & Repair Manual: Cowl Side Trim
Components and components location Component Location 1. Cowl side trim Repair procedures Replacement Put on gloves to protect your hands. • Use a plastic panel removal tool to remove interior tr ...
Copyright © www.kpicanto.com 2017-2024
