Kia Picanto (JA): Interior Trim / Luggage Side Trim
Components and components location
| Component Location |

| 1. Luggage side trim |
Repair procedures
| Replacement |
Put on gloves to protect your hands. |

|

| 1. | Remove the rear seat assembly.
(Refer to Rear Seat - "Rear Seat Assembly")
|
| 2. | Remove the rear door scuff trim by using a remover.
|

| 3. | Remove the luggage board(A).
|

| 4. | Disconnect the tailgate weatherstrip. |
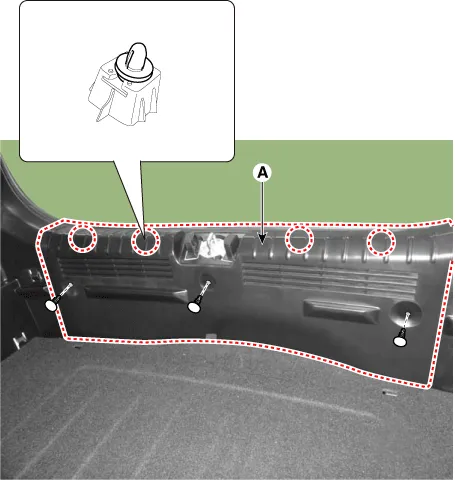
| 5. | Remove the rear transverse trim (A).
|
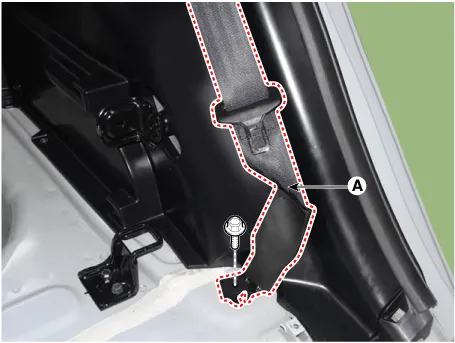
| 6. | Separate the rear seat belt lower anchor (A) after loosening the mounting bolt.
|
| 7. | Remove the folding bracket (A) after loosening the mounting bolts.
|

| 8. | Remove the luggage side trim (A) after loosening the mounting screws.
|

| 9. | Disconnect the luggage lamp connector (A).
|

| 10. | Install in the reverse order of removal.
|
Components and components location Component Location 1. Rear transverse trim Repair procedures Replacement Put on gloves to protect your hands.
Components and components location Component Location 1. Rear pillar trim Repair procedures Replacement Put on gloves to protect your hands.
Other information:
Kia Picanto (JA) 2017-2026 Service & Repair Manual: Back View Camera System
Components and components location Component Location 1. Back view camera 2. AVN head unit 3. steering angle sensor Description and operation Description 1. To display back of the vehicle to assist the driver, it receives vehicle rearside image signal from the rearview camera and displays it on AVN head unit monitor
Kia Picanto (JA) 2017-2026 Service & Repair Manual: Rear Glass Defogger Printed Heater
Repair procedures Inspection • Wrap tin foil around the end of the voltmeter test lead to prevent damaging the heater line. Apply pressure on the tin foil with hand and move the tin foil along the grid line to check for open circuits.
Categories
- Manuals Home
- Kia Picanto Owners Manual
- Kia Picanto Service Manual
- Body Electrical System
- Coolant
- Cooling System
- New on site
- Most important about car
