Kia Picanto (JA): Cylinder Head Assembly / Cylinder Head Cover
Components and components location
| Components |
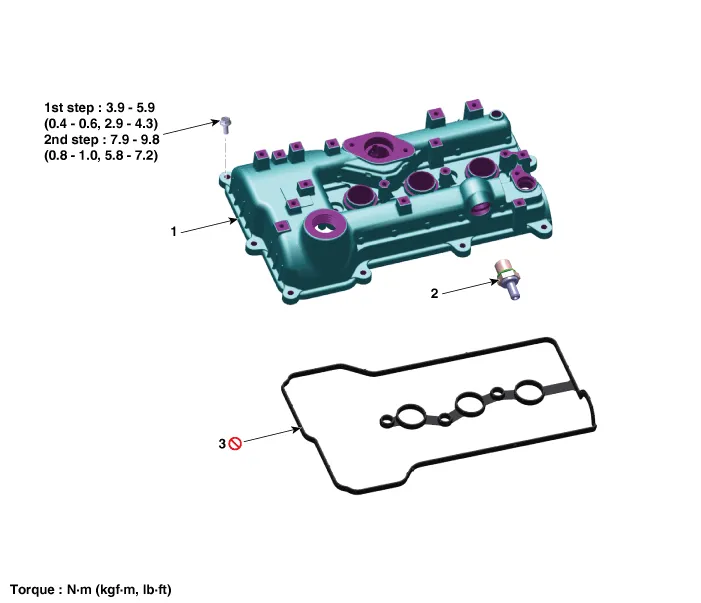
| 1. Oil filler cap 2. Cylinder head cover | 3. Cylinder head cover gasket |
Repair procedures
| Removal |
|

Mark all wiring and hoses to avoid misconnection. |

| 1. | Disconnect the battery negative terminal. |
| 2. | Remove the air cleaner assembly.
(Refer to Intake and Exhaust System - "Air Cleaner")
|
| 3. | Drain the engine coolant.
(Refer to Cooling System - "Coolant")
|
| 4. | Disconnect
the wiring connectors and harness clamps and remove the wiring
protector around the intake manifold and cylinder head cover.
|

| 5. | Disconnect the fuel hose (A).
|
| 6. | Remove the heated oxygen sensor (HO2S).
(Refer to Engine Control / Fuel System - "Heated Oxygen Sensor (HO2S)")
|
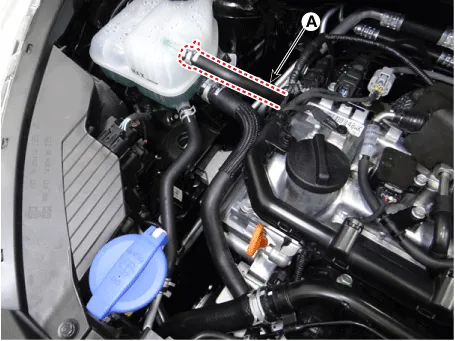
| 7. | Disconnect the coolant hose (A).
|

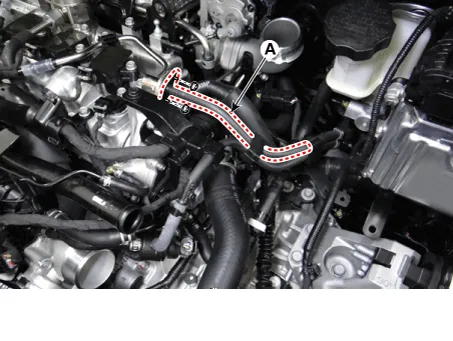
| 8. | Disconnect the turbo charger water drain hose (A).
|
| 9. | Remove the turbo manifold module heat protector (A).
|
| 10. | Remove the turbo charger water pipe (B).
|
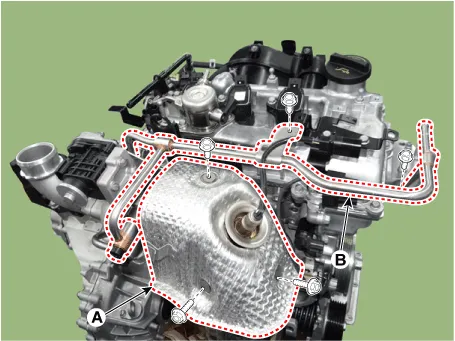
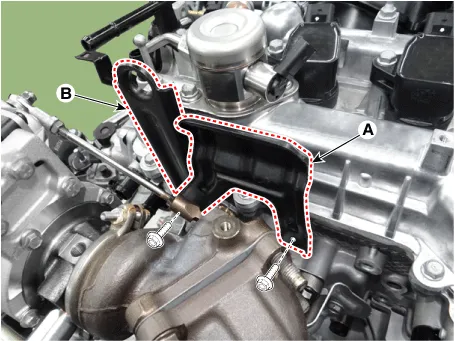
| 11. | Remove the heat protector (A) and engine hanger (B).
|
| 12. | Remove the high pressure fuel pump.
(Refer to Engine Control / Fuel System - "High Pressure Fuel Pump")
|
| 13. | Remove the ignition coil.
(Refer to Engine Electrical System - "Ignition Coil")
|
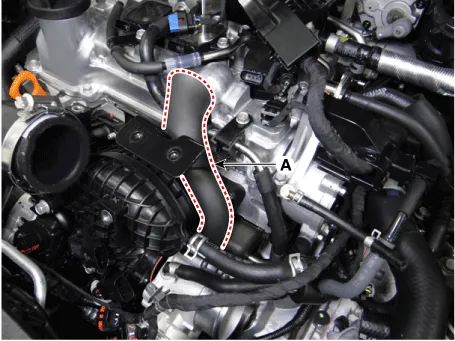
| 14. | Disconnect the positive crankcase ventilation (PCV) hose (A).
|
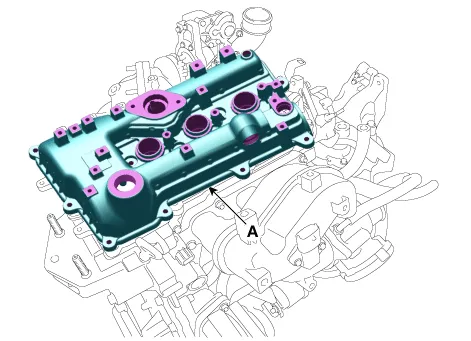
| 15. | Remove the cylinder head cover (A) with gasket.
|
| Installation |
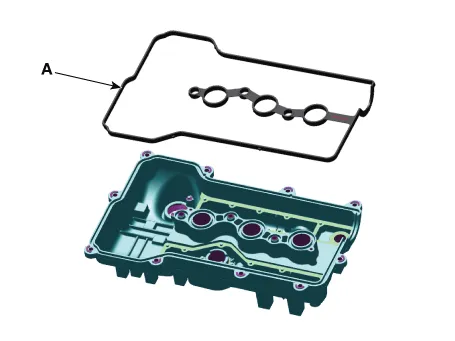
| 1. | Install the new cylinder head cover gasket (A).
|
| 2. | The
hardening sealant on the upper area between chain cover & oil pump
assembly and cylinder head should be removed before assembling cylinder
head cover. |
| 3. | Assemble within 5 minutes of applying sealant.
|
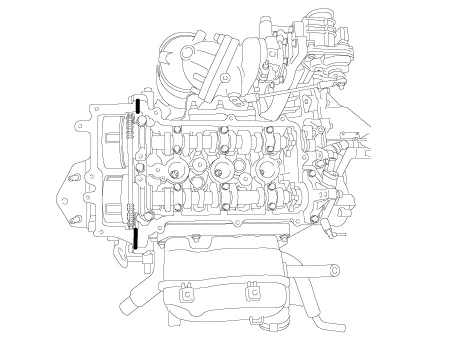
| 4. | Install the cylinder head cover (A).
|
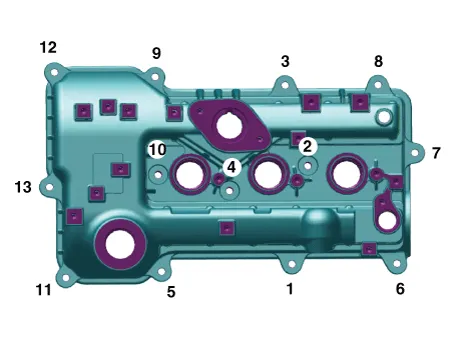
| 5. | Install the cylinder head cover bolts in the following two step method.
|
| 6. | Install the remaining parts in the reverse order of removal. |
Components and components location Components 1. Cylinder head gasket 2. Cylinder head 3. Intake oil control valve (OCV) 4. Exhaust oil control valve (OCV) 5.
Repair procedures Removal and Installation 1.Disconnect the battery negative terminal. 2.Disconnect the wiring connectors and harness clamps and remove the connector brackets around the vacuum pump.
Other information:
Kia Picanto (JA) 2017-2026 Service & Repair Manual: Rear Glass Defogger Printed Heater
Repair procedures Inspection • Wrap tin foil around the end of the voltmeter test lead to prevent damaging the heater line. Apply pressure on the tin foil with hand and move the tin foil along the grid line to check for open circuits.
Kia Picanto (JA) 2017-2026 Service & Repair Manual: Seat Heater Switch
Components and components location Components 1. Driver side seat heater switch 2. Passenger side seat heater switch Schematic diagrams Circuit Diagram Repair procedures Removal 1. Disconnect the negative (-) battery terminal.
Categories
- Manuals Home
- Kia Picanto Owners Manual
- Kia Picanto Service Manual
- Battery
- Heating,Ventilation, Air Conditioning
- Timing Chain
- New on site
- Most important about car
