
Kia Picanto (JA): Interior Trim / Cowl Side Trim
Components and components location
| Component Location |

| 1. Cowl side trim |
Repair procedures
| Replacement |
Put on gloves to protect your hands. |

|

| 1. | Remove the front door scuff trim.
(Refer to Interior Trim - "Door Scuff Trim")
|
| 2. | Remove the hood latch release handle (A).
|

| 3. | Carefully remove the front door body side weatherstrip. |
| 4. | Using a remover, remove the cowl side trim (A).
|
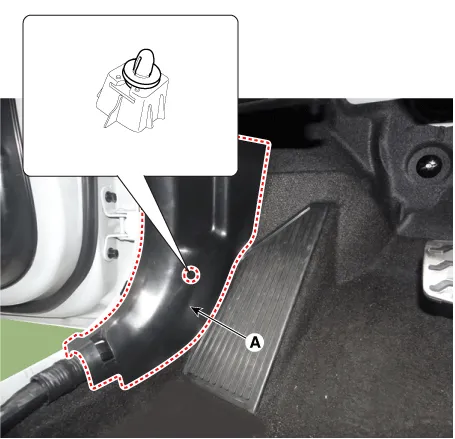
| 5. | Install in the reverse order of removal.
|
Components and components location Component Location 1. Front door scuff trim 2. Rear door scuff trim Repair procedures Replacement Put on gloves to protect your hands.
Components and components location Component Location 1. Front pillar trim Repair procedures Replacement Put on gloves to protect your hands.
Other information:
Kia Picanto (JA) 2017-2026 Service & Repair Manual: Lighting System
Specifications Specification Item Type Bulb Watt (W) Front Headlamp Halogen (Position lamp) Low/High H4 LL 55/60 Turn signal lamp PY21WLL 21 Position lamp W5WLL 5 Halogen (Position lamp + DRL) Low/High HB3 (9005HL+) 60 Turn signal lamp LED LED Po
Kia Picanto (JA) 2017-2026 Service & Repair Manual: Multifunction Switch
Specifications Specifications Items Specifications Rated voltage DC 12 V Operating temperature range -22 - 176°F (-30 - 80°C) Rated load Washer Washer : 6A (Motor load) Components and components location Component 1 .
Categories
- Manuals Home
- Kia Picanto Owners Manual
- Kia Picanto Service Manual
- Engine And Transaxle Assembly
- Features of your vehicle
- Charging System
- New on site
- Most important about car
