
Kia Picanto (JA): Body Electrical System / Auto Lighting Control System
Specifications
| Specifications |
|
Items
|
Specifications
| |
| Rated voltage | 5V | |
| Load | Max. 1mA (Relay load) | |
| Illuminations (LUX) | 50 | 1.22 ± 0.27 V |
| 150 | 3.23 ± 0.71 V | |
Components and components location
| Component Location |
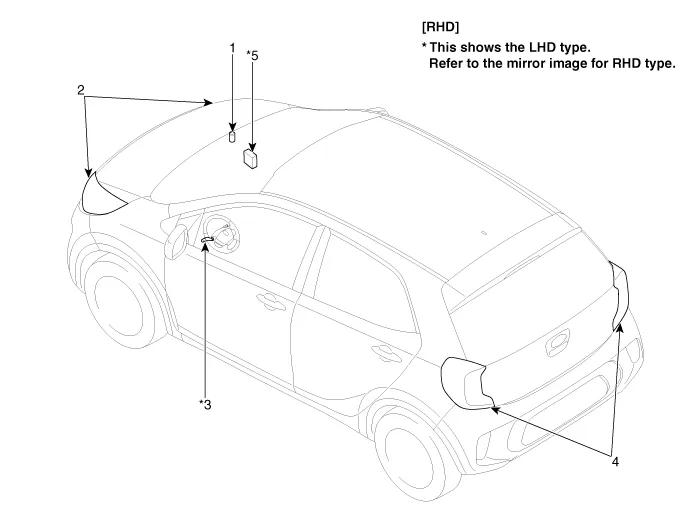
| 1. Auto light sensor 2. Headlamps 3. Lighting switch (Auto) | 4. Tail lamps 5. Body Control Module (BCM) |
Schematic diagrams
| Circuit Diagram |
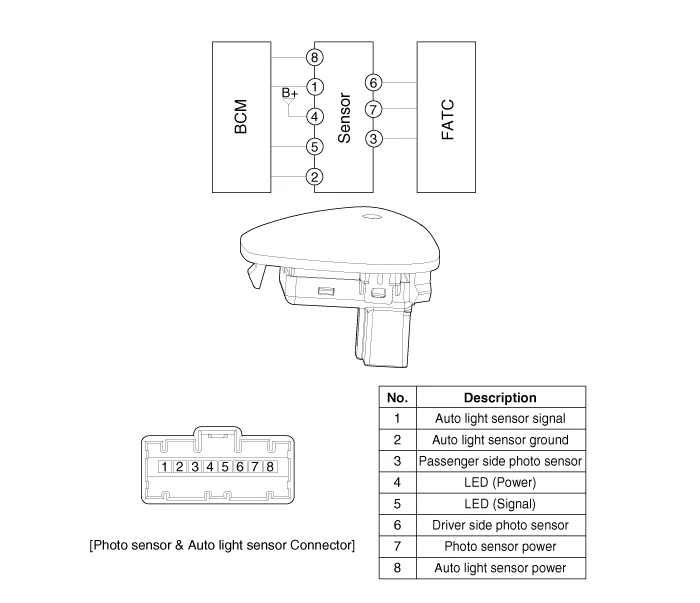
Description and operation
| Description |
| 1. | Do not add another device on top of this device. |
| 2. | Be sure to switch to manual during poor visibility climate, such as fog, heavy rain, or cloudy weather. |
| 3. | Illumination
intensity in an actual vehicle is not always constant, and lamp ON/OFF
time may very depending on the climate, season, and surrounding
environment. |
| 4. | Use this system only during sunrise and sunset period, and manually control lamp ON/OFF for general conditions. |
| 5. | Error may occur if light block coating that may change interior illumination is applied. |
Schematic diagrams Circuit Diagram Description and operation Description The multimedia jack on the console upper cover is for customers who like to listen to external portable music players like the MP3 etc.
Repair procedures Inspection Check if the auto light control operates like a timing chart shown below. Tail lamp output and head lamp (Low) output is controlled based on the auto light sensor's input (illumination intensity) when the Auto Light Switch in Multi-Function Switch is turned ON, and the vehicle is in IGN1 or IGN2 ON Mode.
Other information:
Kia Picanto (JA) 2017-2026 Service & Repair Manual: Fuses And Relays
C
Kia Picanto (JA) 2017-2026 Service & Repair Manual: Sunroof Switch
Components and components location Components Repair procedures Inspection 1. Disconnect the negative (-) battery terminal. 2. Remove the map lamp lens (A). 3. Remove the map lamp (B) after loosening the mounting screws. 4.
Categories
- Manuals Home
- Kia Picanto Owners Manual
- Kia Picanto Service Manual
- Timing Chain
- Engine Control / Fuel System
- Thermostat
- New on site
- Most important about car
